So you’ve heard all the cool reasons why you should start a vlog, now we’re going to show you how to start one. If you’re on the fence and haven’t read our first post Why You Should Start a Vlog, you should read that first! Here is a quick tutorial on how we suggest adding your YouTube feed to your website.
Step One: Download the Plugin YourChannel
On the side menu in your dashboard, go to Plugins > Add New. Search for the plugin called YourChannel and download and activate it.
Step Two: Create an API Key
We promise this isn’t as scary as it sounds. In fact, the YourChannel plugin offers a tutorial on how to set up an API Key through Google. So we’re going to get a little Inception on you and refer you to another tutorial within a tutorial. Learn how to set up a Google API Key here! Or just click the “instructions here” link inside the plugin.
Step Three: Find Your YouTube Channel
We suggested finding your Channel ID to sync your Plugin. To find your Channel ID follow these simple steps!
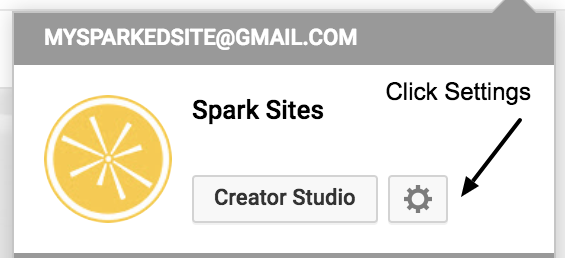
In the top righthand corner of your YouTube account click your profile icon. After you’ve clicked it, a dropdown box will appear. In the first box click the Settings button.
After clicking settings you will be brought to a new page. Scroll slightly and click the “Advanced” link underneath your general account info.
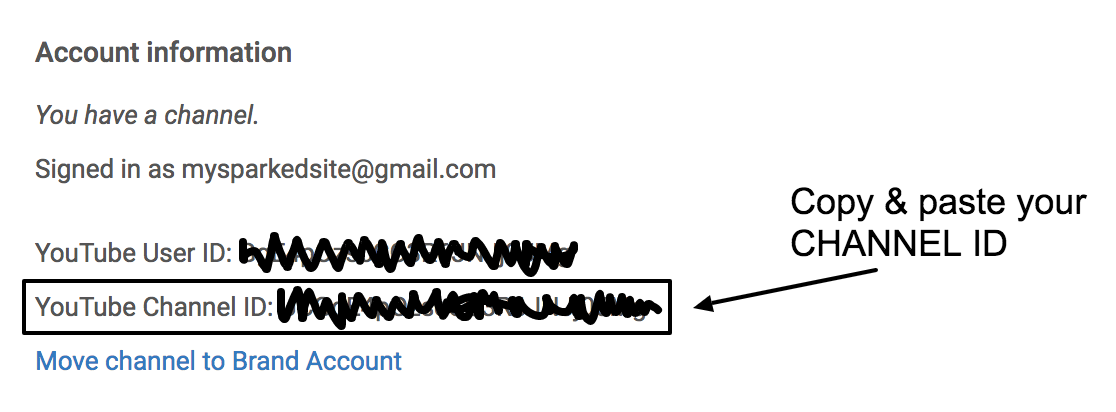
Clicking “Advanced” takes you to the page where you can find your Channel ID. Copy and paste that ID code into the Channel ID box within the plugin. Make sure you copy the Channel ID and not the User ID.
Step Four: Decided What You Want On Your Channel
There are three options: videos, playlists and banner. Word of the wise, you definitely want to select at least videos or playlist. Selecting Videos will show the videos that are currently uploaded to your YouTube channel. Selecting Playlists allows you to have a more selected list of videos available for users to view. Selecting Banner will just pull the banner that is currently onto your channel onto your webpage. This is not necessary, but if you want your banner to show, you have the option!
Step Five: Customize Your Feed
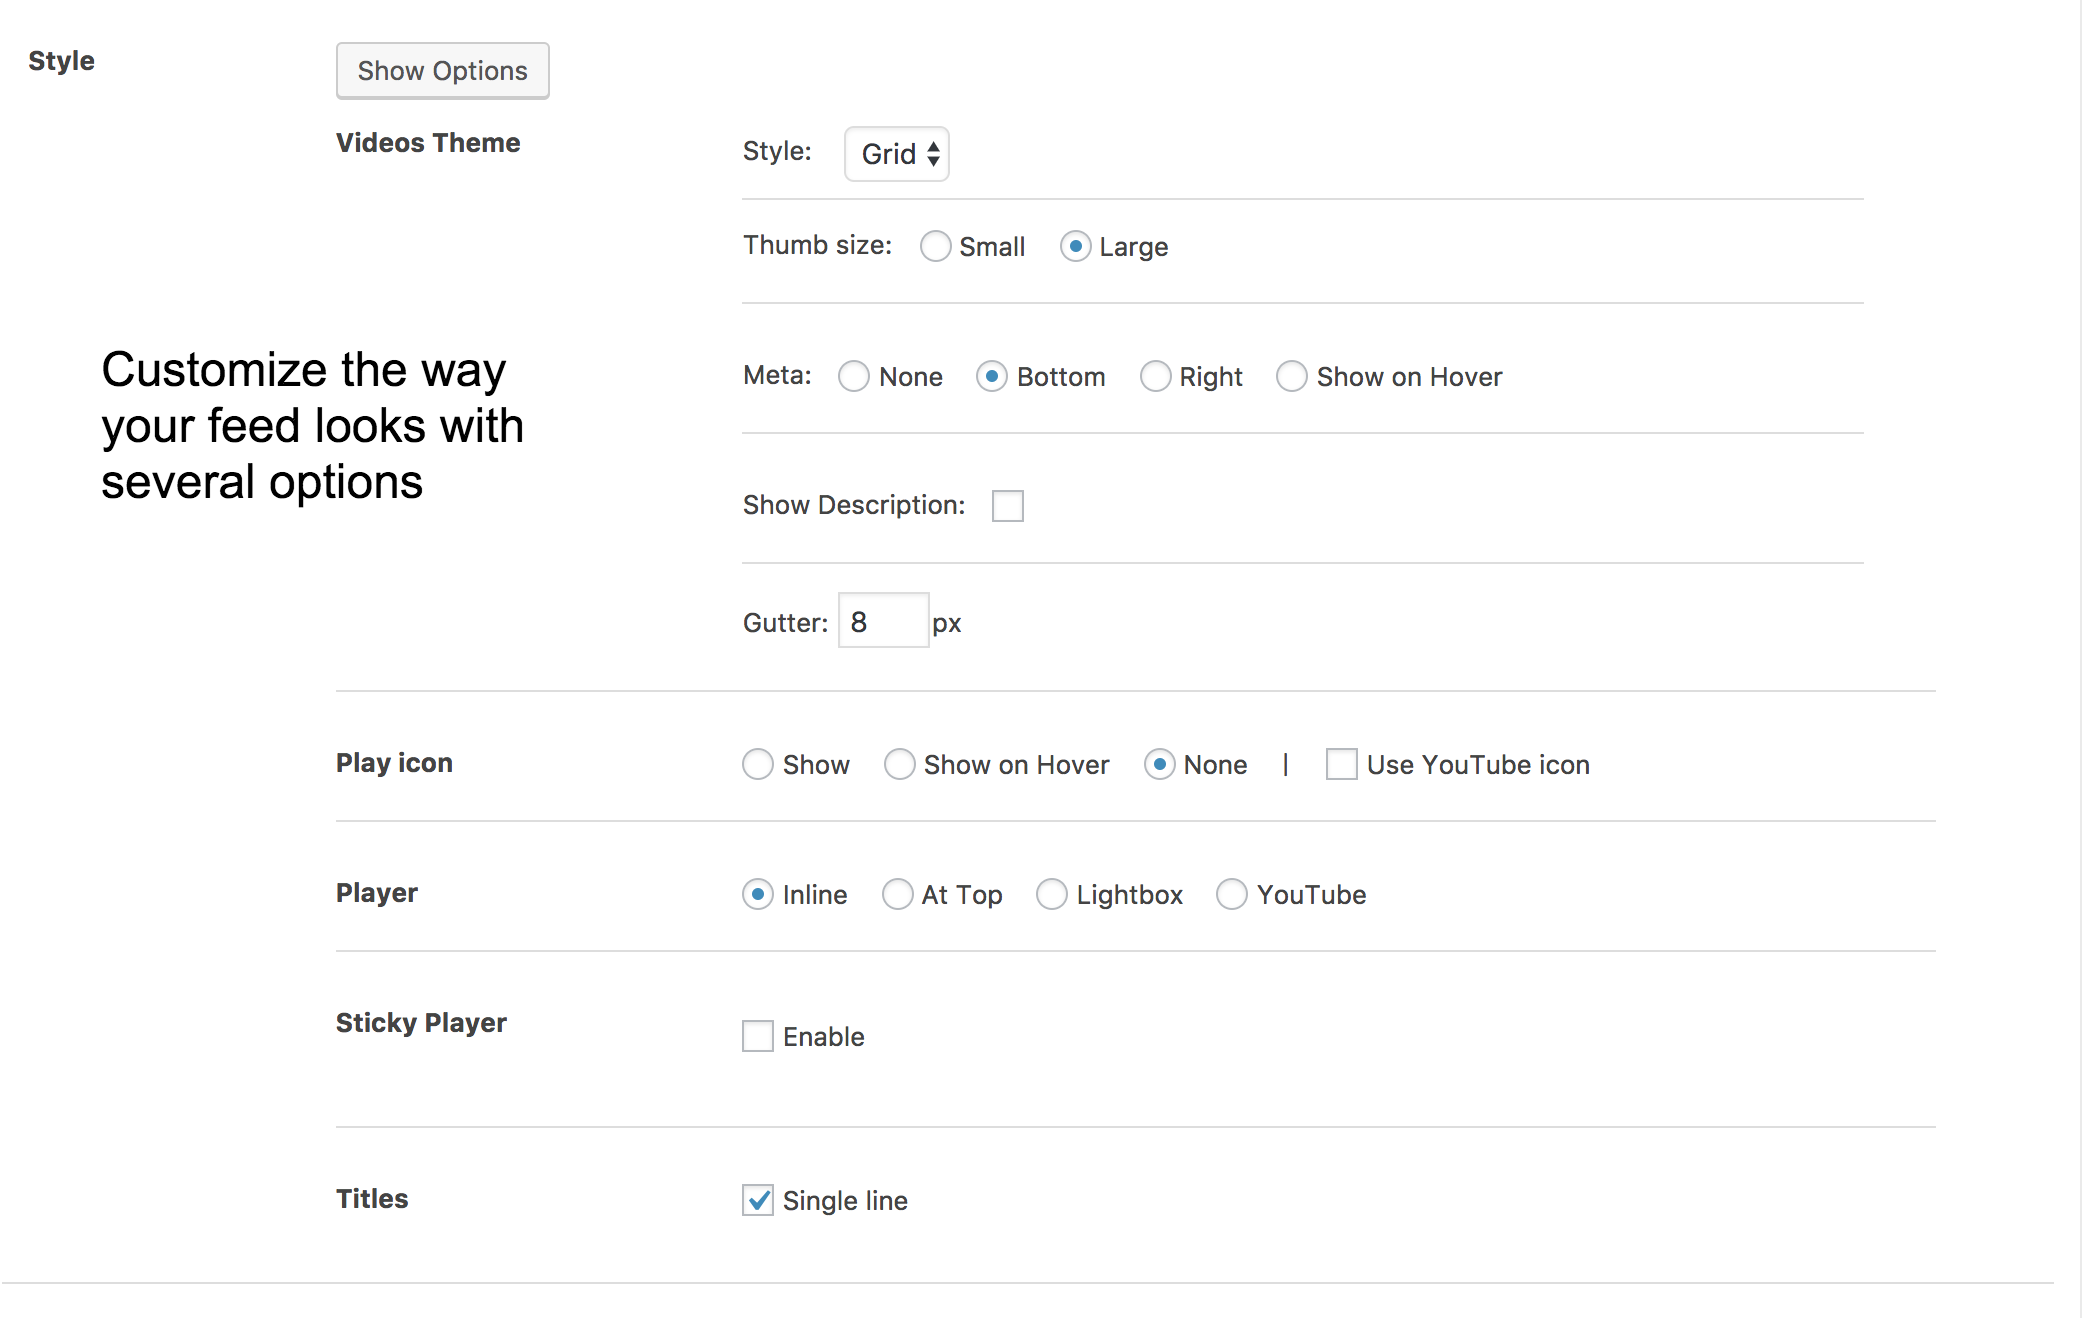
There are several options to choose from when customizing your channel for your website. You can choose whether you want your feed to appear in grid or list form, how large the thumbnail sizes are, where the meta appears and so on. We suggest playing around with this section until you find a look you like. If you scroll below the editing box you will find a preview of whatever you’re customizing.
Step Six: Choose the Number of Videos
This is pretty straight forward. Videos per load allows you to customize the amount of videos appears per “page.” The Max Videos allows you to set a max number of videos from your Channel that will load on your webpage. Leaving it blank means there is no limit as to how many videos can load from your feed.
Step Seven: Copy and Paste the Shortcode
Once you’ve saved all your changes you can copy and paste the generated shortcode into a text module. Once everything is in place, your YouTube channel will be live on your site! This is the perfect way to have a vlog feed on your website. A great example of a vlog feed using the YourChannel plugin is one of our clients No Boring Concrete! Check it out and be sure to use YourChannel to set up your vlog in the future!
As always, if you get stuck on any of these steps, feel free to contact us with any questions you may have. Now get vlogging!
