Having a password protected page may seem like something only accessible to the rich and the famous, but the truth is it could not be easier more accessible for anyone with a WordPress site to set up. Before we get into that, it’s important to understand instances where having password protected pages is necessary. Users will not love needing to have a password for every page they encounter on your site, but there are benefits to having them for certain kinds of pages.
When is it necessary to have password protected pages?
MARKETING: It’s simple: people want what they can’t have. If you require someone’s email or membership in exchange for a password, that gives you an advantage on grabbing potential customers.
DEVELOPMENT / STAGING: Sometimes it’s hard to envision a webpage design through a sketch or photoshop created concept. You can create a staging and development page with the website design live on your website without page visitors seeing the page under construction. Only designers, developers and other team members will have access to the password to see this page.
PRIVATE EVENTS: Using a calendar plugin you can create a private event that guest will receive a special password in order to RSVP.
So now that you know a few useful purposes behind password protected pages, here’s how you set them up!
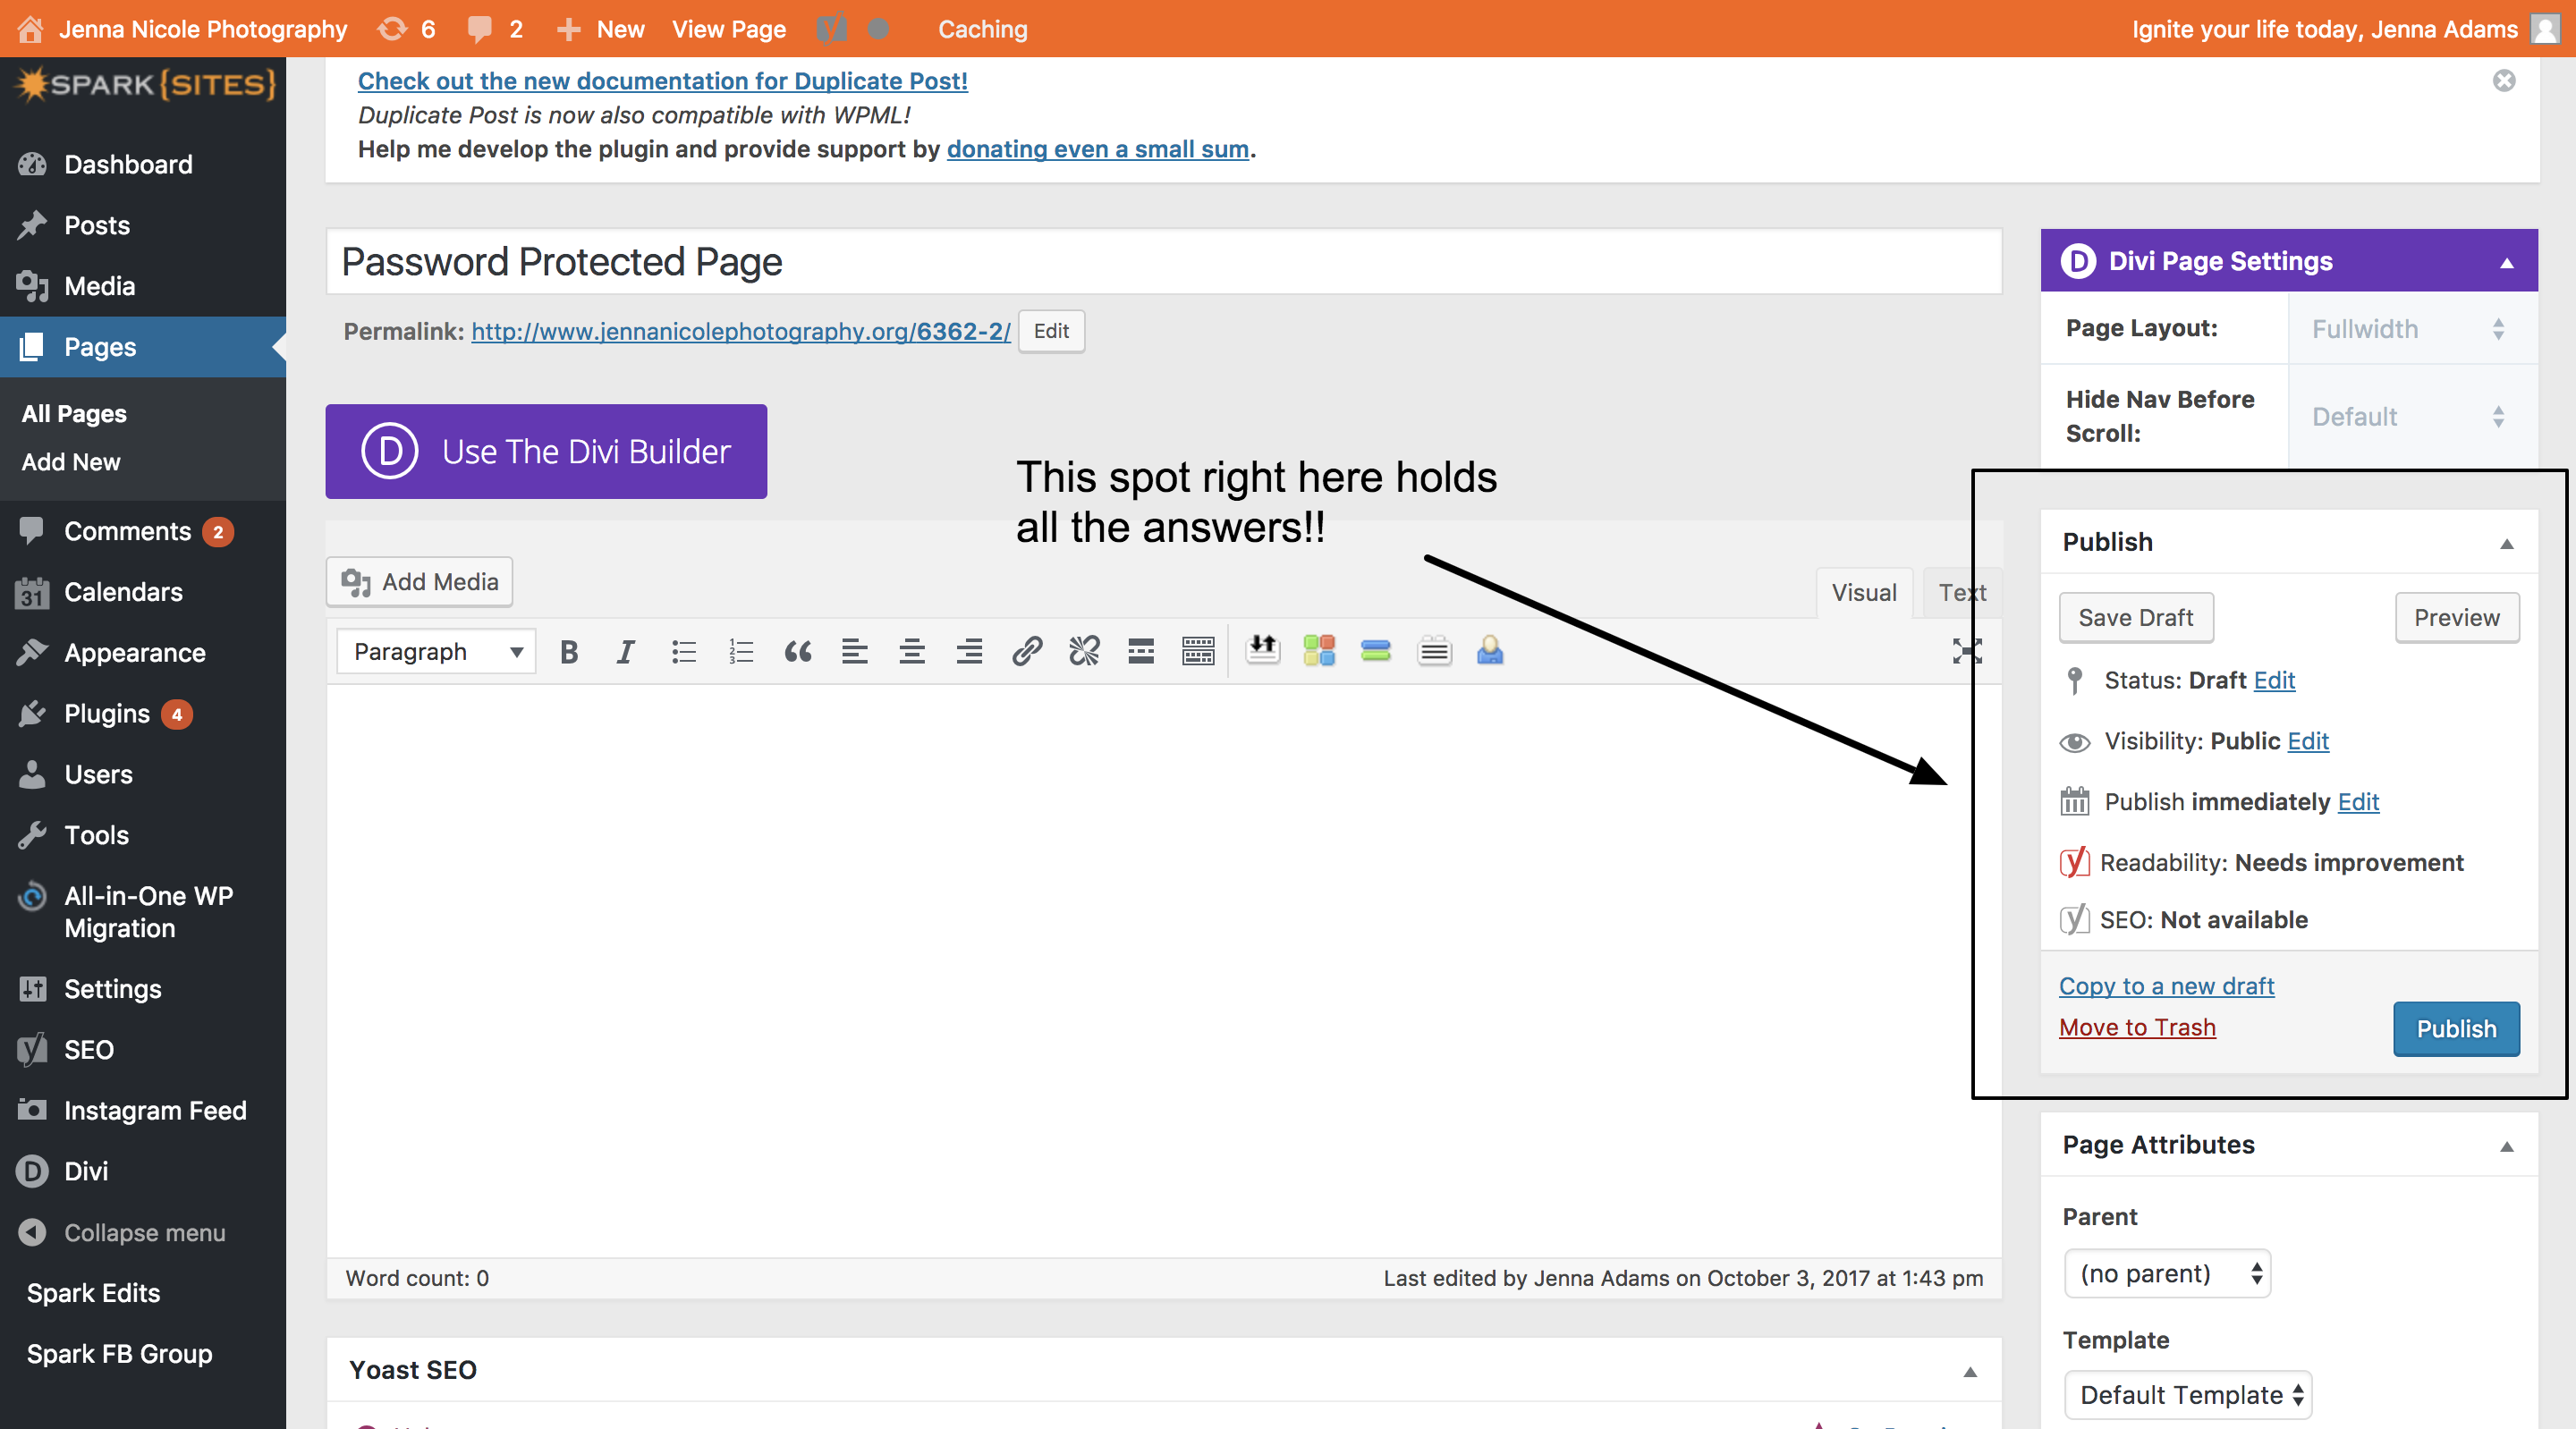
Step One: Locate the Publishing Panel
Whether you are making a page or a post, you can access the publish panel on the right hand side. You don’t even need to scroll to find it, it should instantly be there as soon as you open the page / post builder.
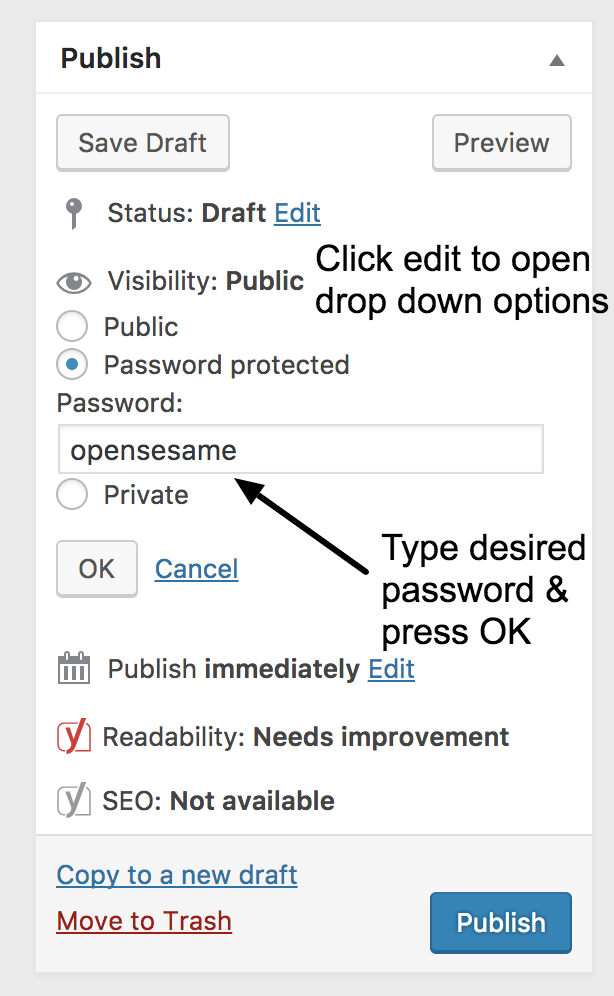
Step Two: Change Visibility Settings
Next to where you see the eyeball and the text “visibility,” click edit and a list of options will pop up below it. Change your visibility from “public” to “password protected.” From here you can enter in your desired password and click “OK.”
Step Three: Publish Your Page
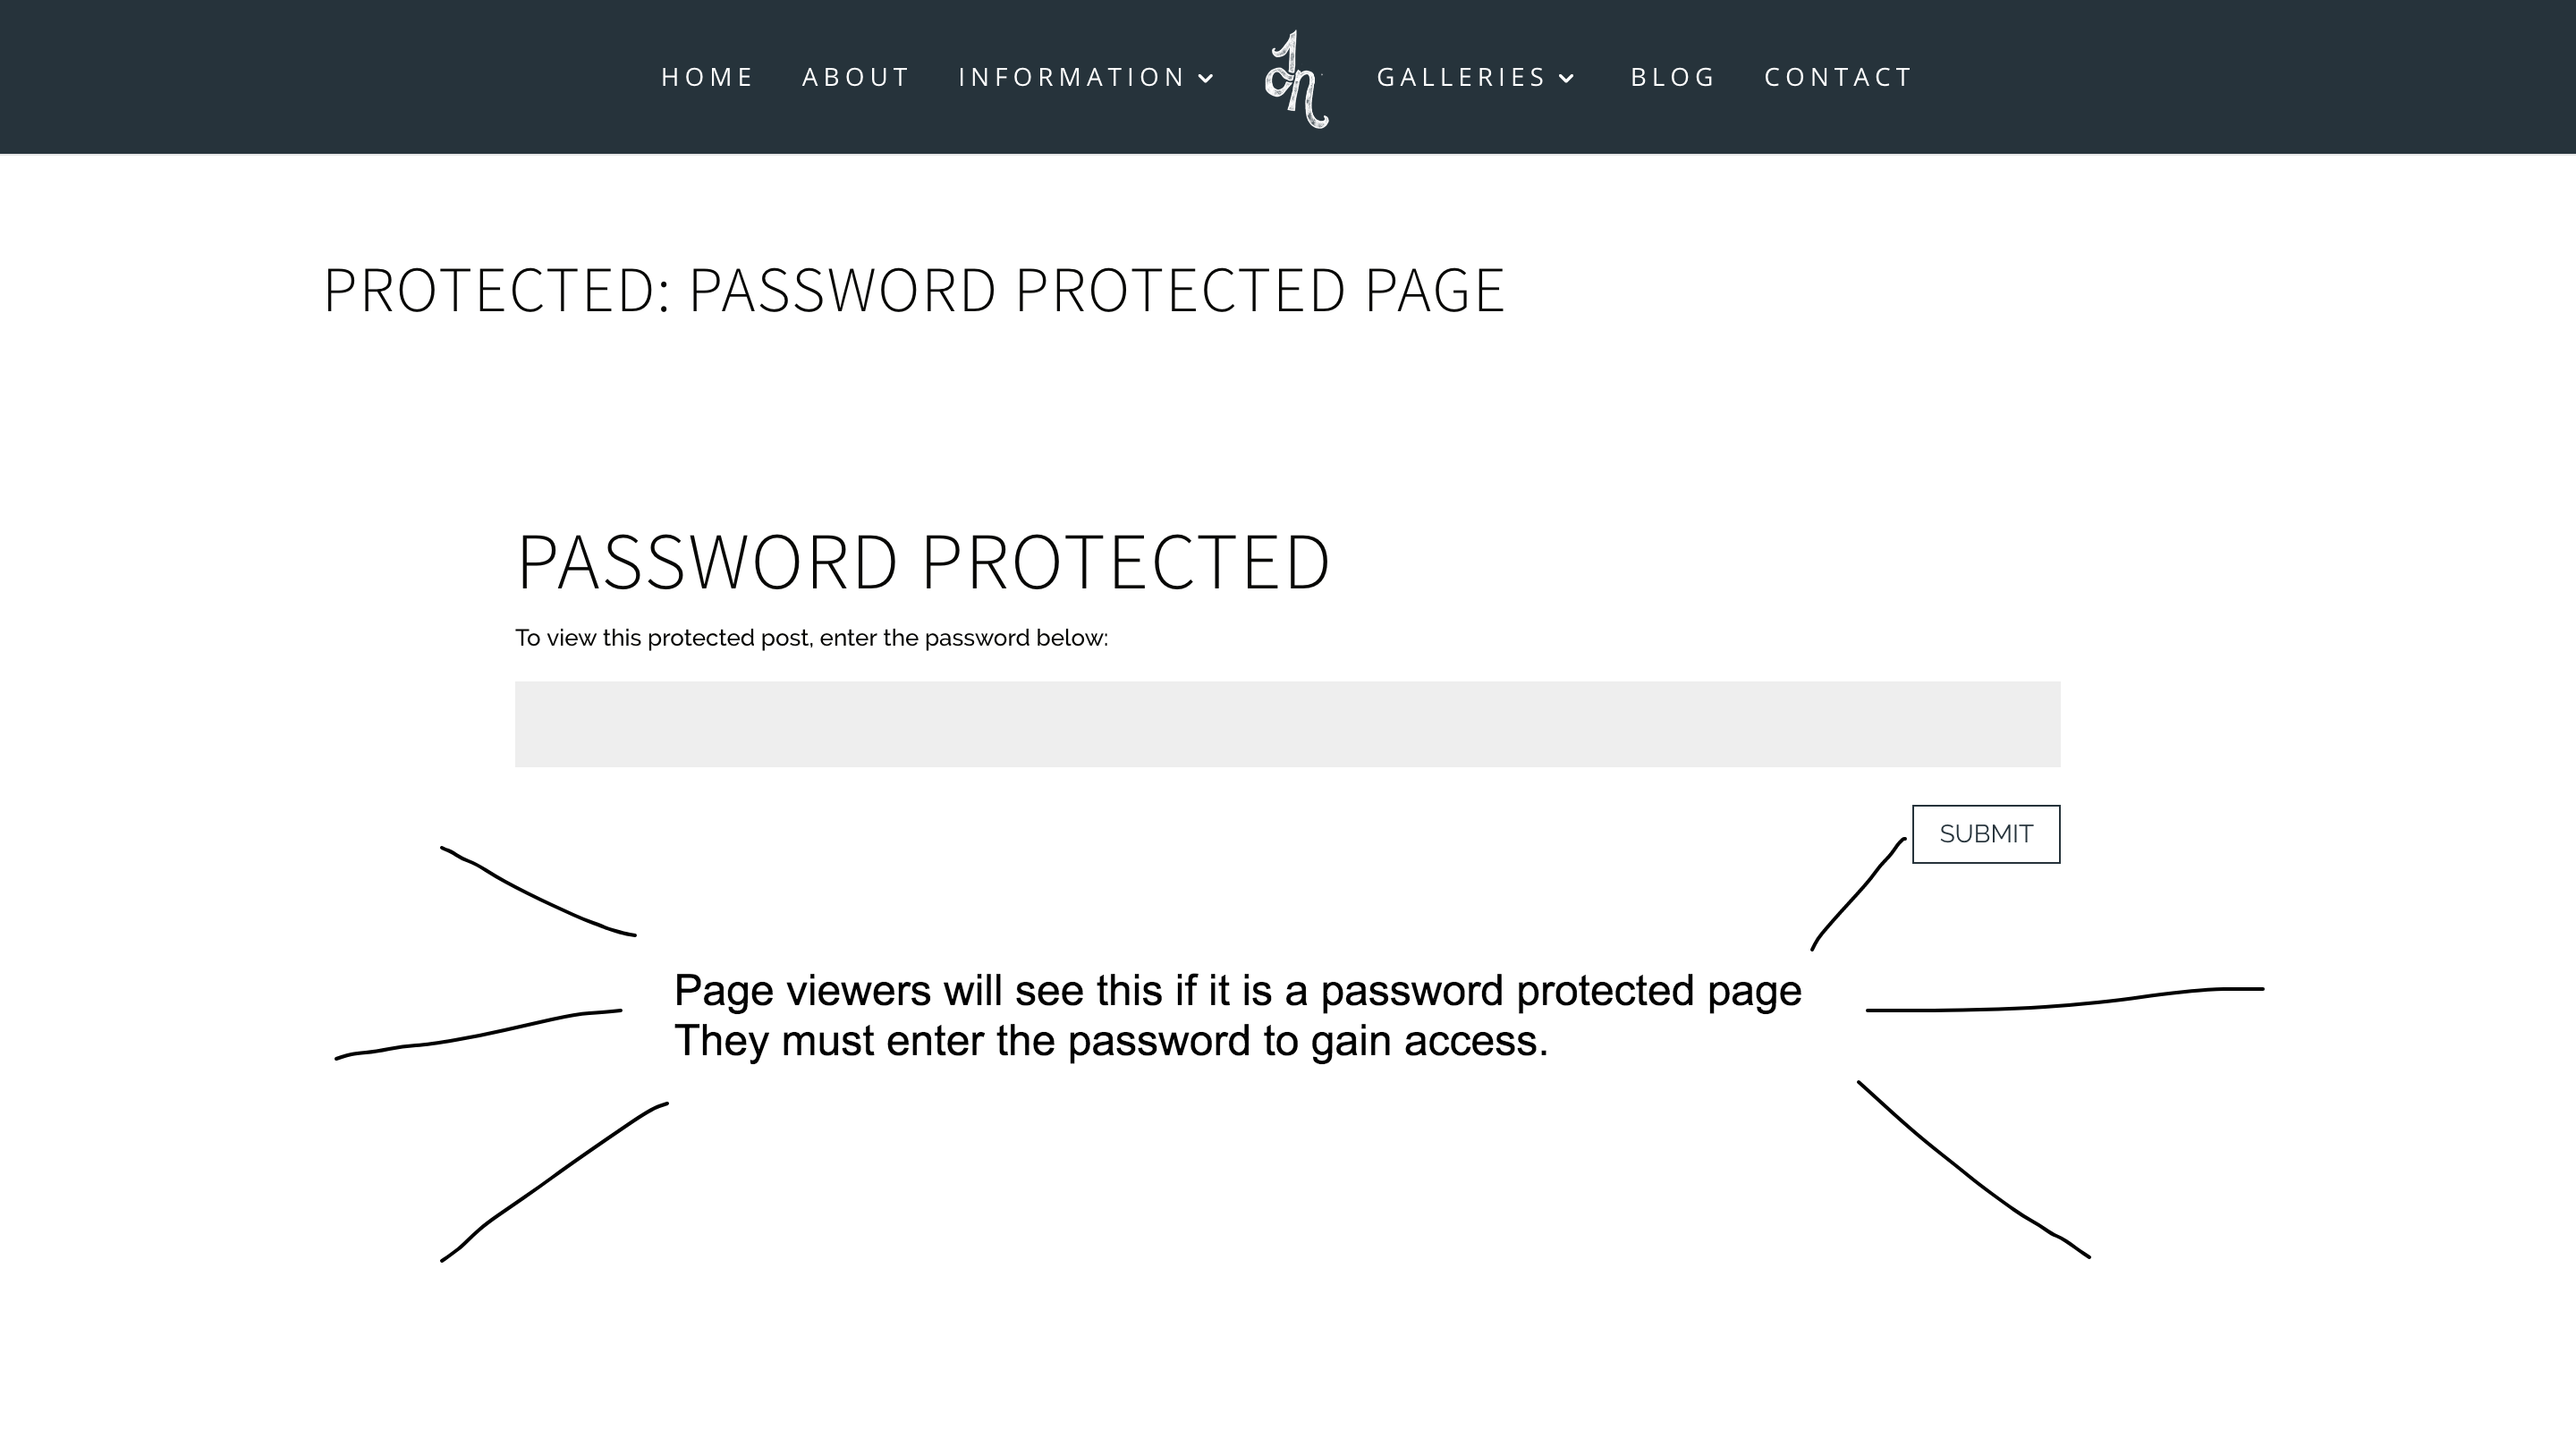
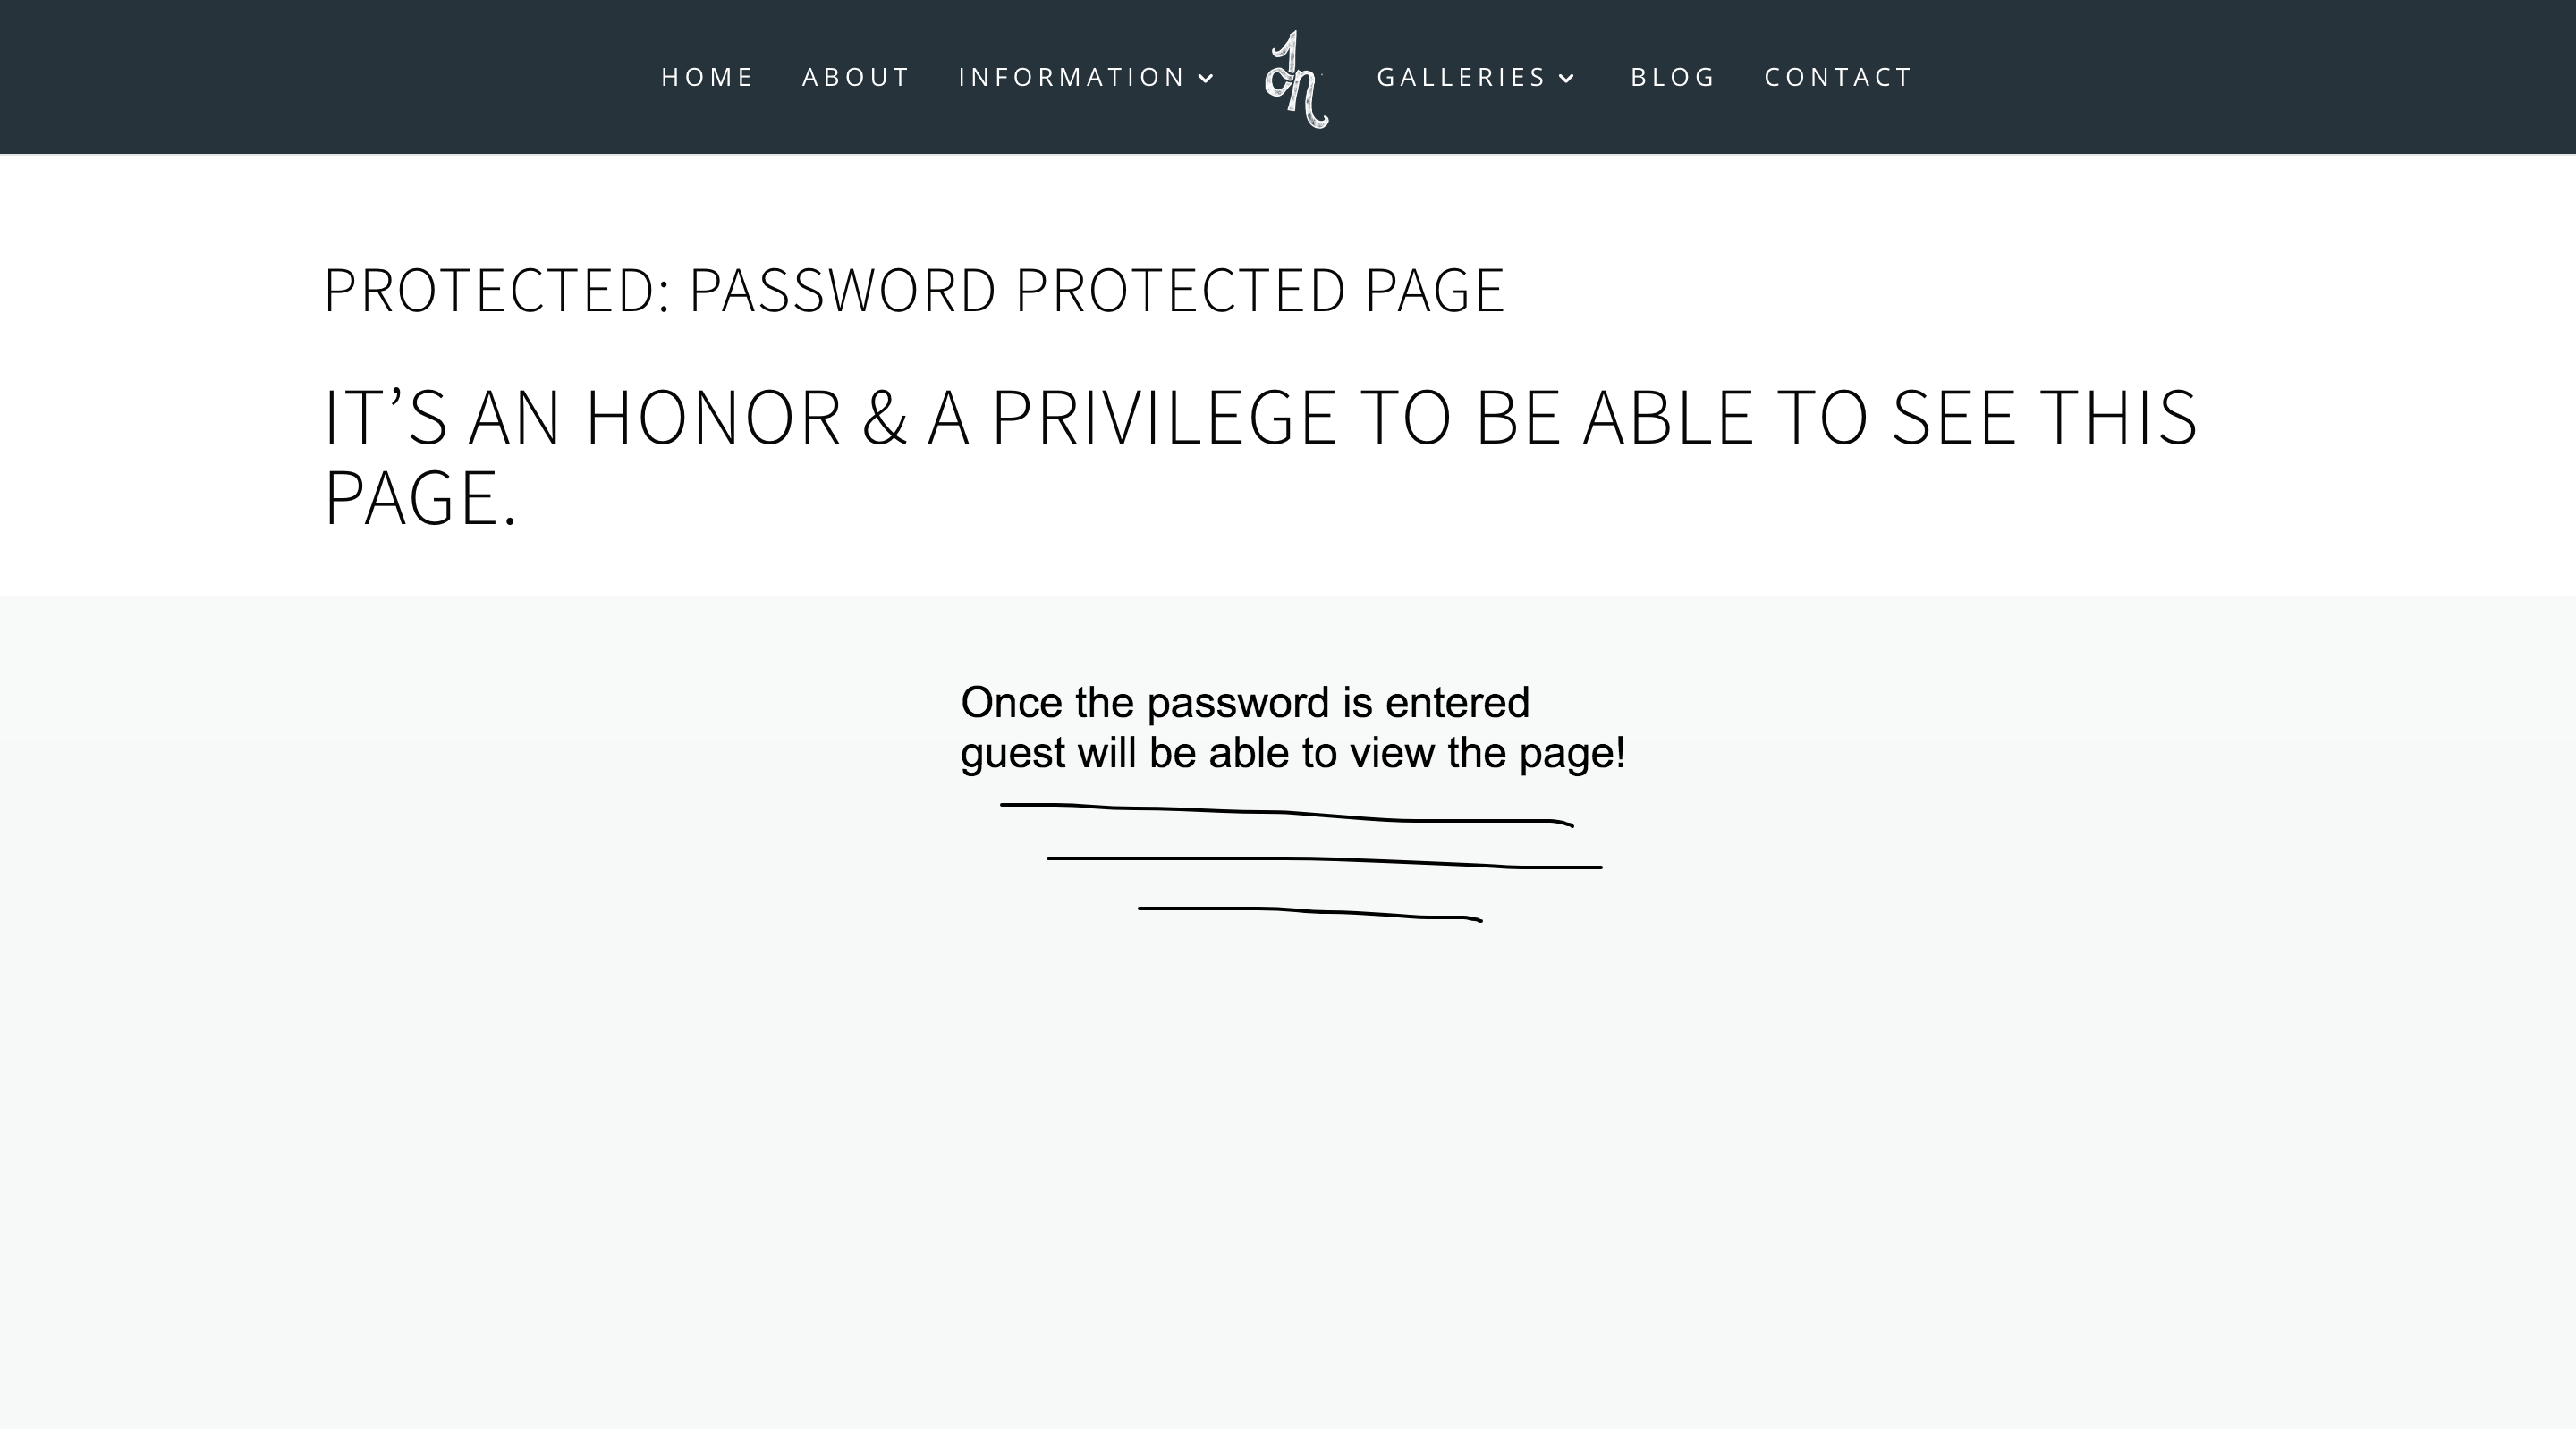
If your done creating your page and setting your visibility settings, publish your page! When page visitors encounter your password protected page they will not be able to view your content and instead will need to enter the password you have set for the page.
Step Four: Enter the Password
If a page visitor has access to the set password they will then enter it in and…
Be able to view your Password Protected Page!
Password protect pages can be handy when you only want a select or privileged group of users to be able to view your page. It will allow you to be able to post more to your website, without having to worry if people are viewing your page when they aren’t suppose to. If you are still stumped after this tutorial, feel free to reach out and our Spark team would be happy to help get your pages protected!

