Opt-in forms are an excellent way to collect emails in order to engage your customers. One of the best places to put an opt-in form is in your sidebar on your blog page! Your blog page is where you’re able display some of your “juiciest” content and if your customers like what they’re reading, they likely will want to hear more from you and be eager to subscribe.
Bloom is our favorite opt-in form we can offer you! It’s an easy-to-use opt-in form builder that is completely customizable to your brand. Here’s how its done!
Step 1: Create a New Opt-in
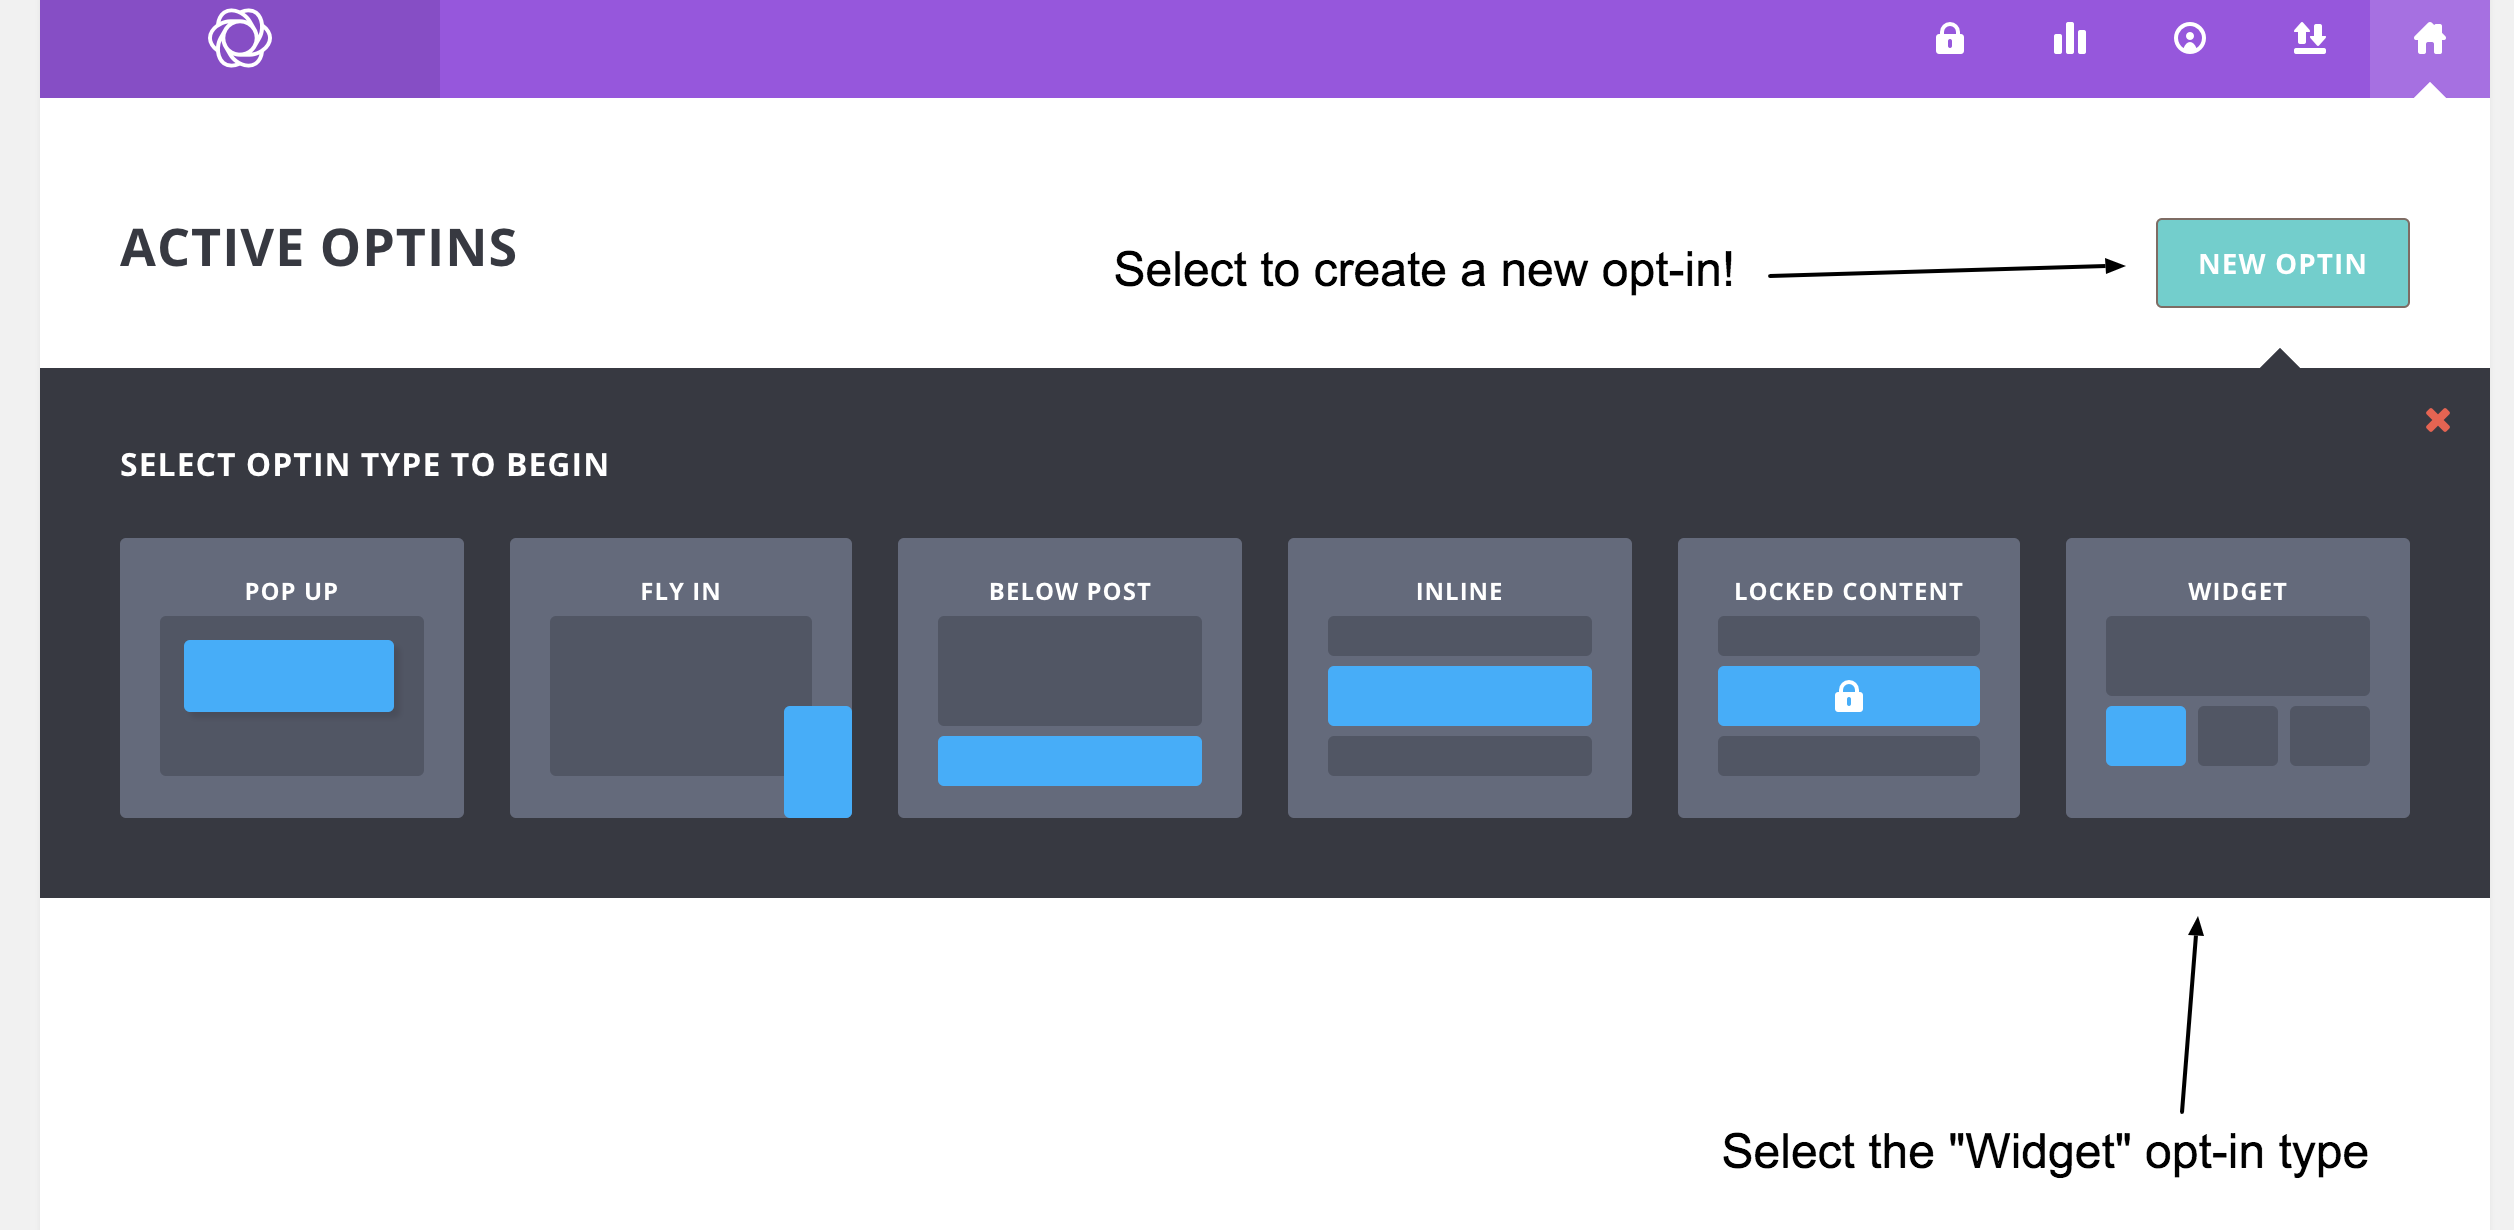
Once we have provided you with the Bloom plugin and it’s been installed on your WordPress, click on “Bloom” on the left menu in your dashboard. Once inside, select “NEW OPTIN.” From there a list of different opt-in types will appear. Since we want to add this to a sidebar, be sure to select the widget type.
Step 2: Name Your Opt-in and Authorize your Email
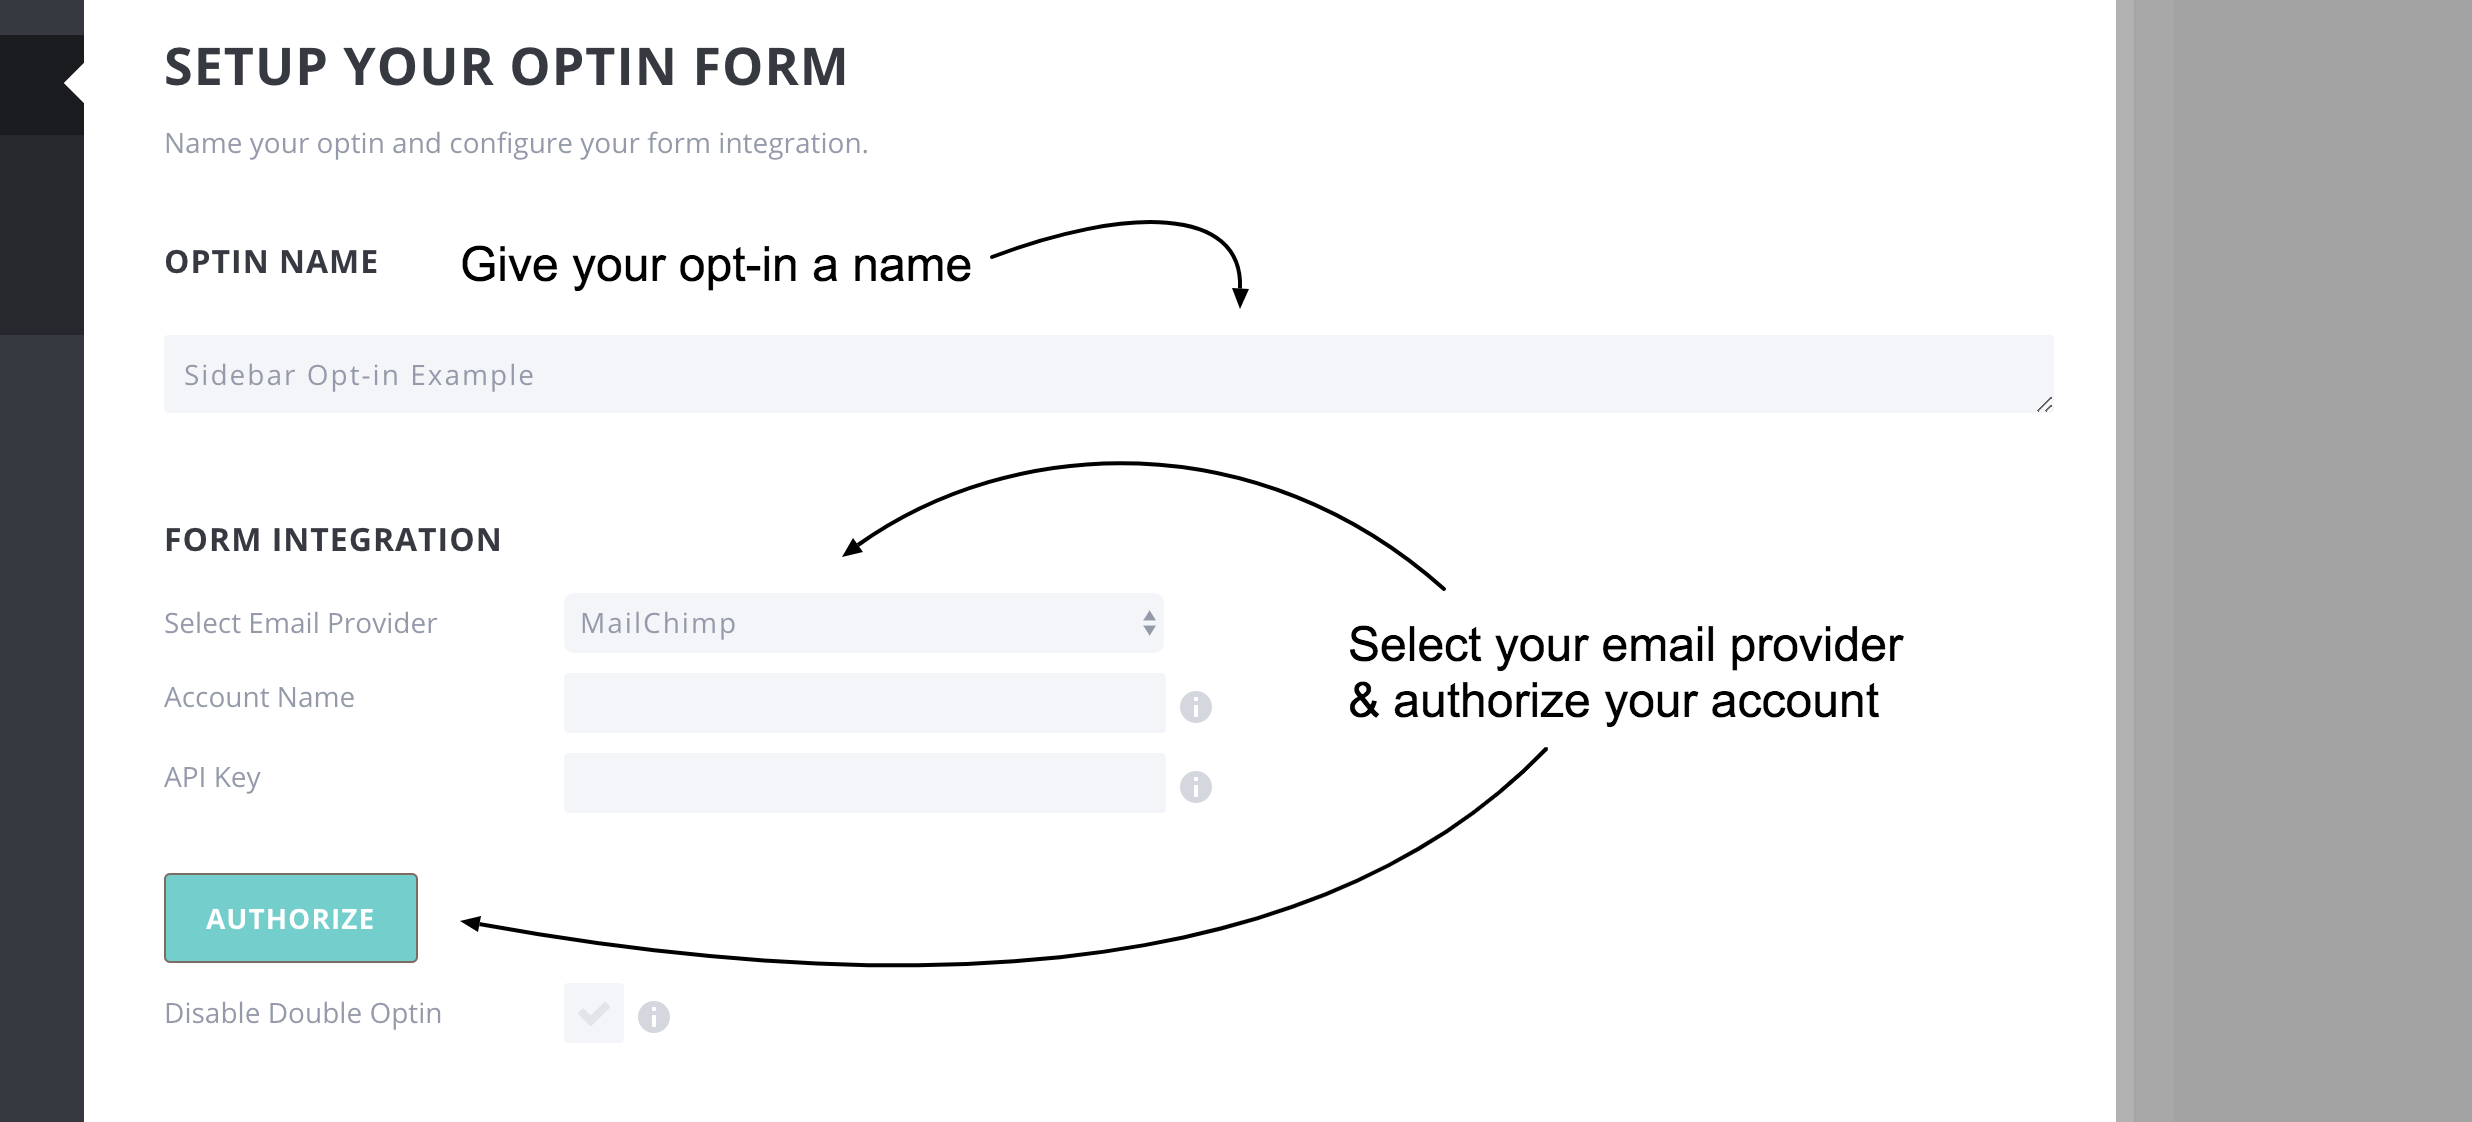
Naming the opt-in is easy, it’s integrating the form that can be a little tricky. Select your email provider (i.e. Mailchimp) from the dropdown. It will then ask you to enter your account name and the API Key. Your API Key can be copied and pasted from your email provider account. Once your API Key is verified, you will be able to select which email list you would like your opt-in to be connected to. Once you have completed these steps click the “NEXT” button in the bottom right-hand corner.
Step 3: Design Your Opt-in
First, select from a number of templates to base your design off of. We suggest one that already looks like it would belong in a sidebar.
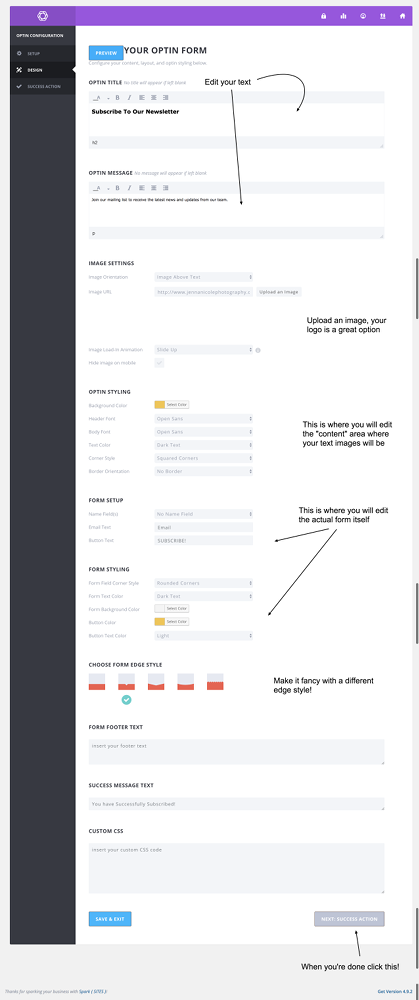
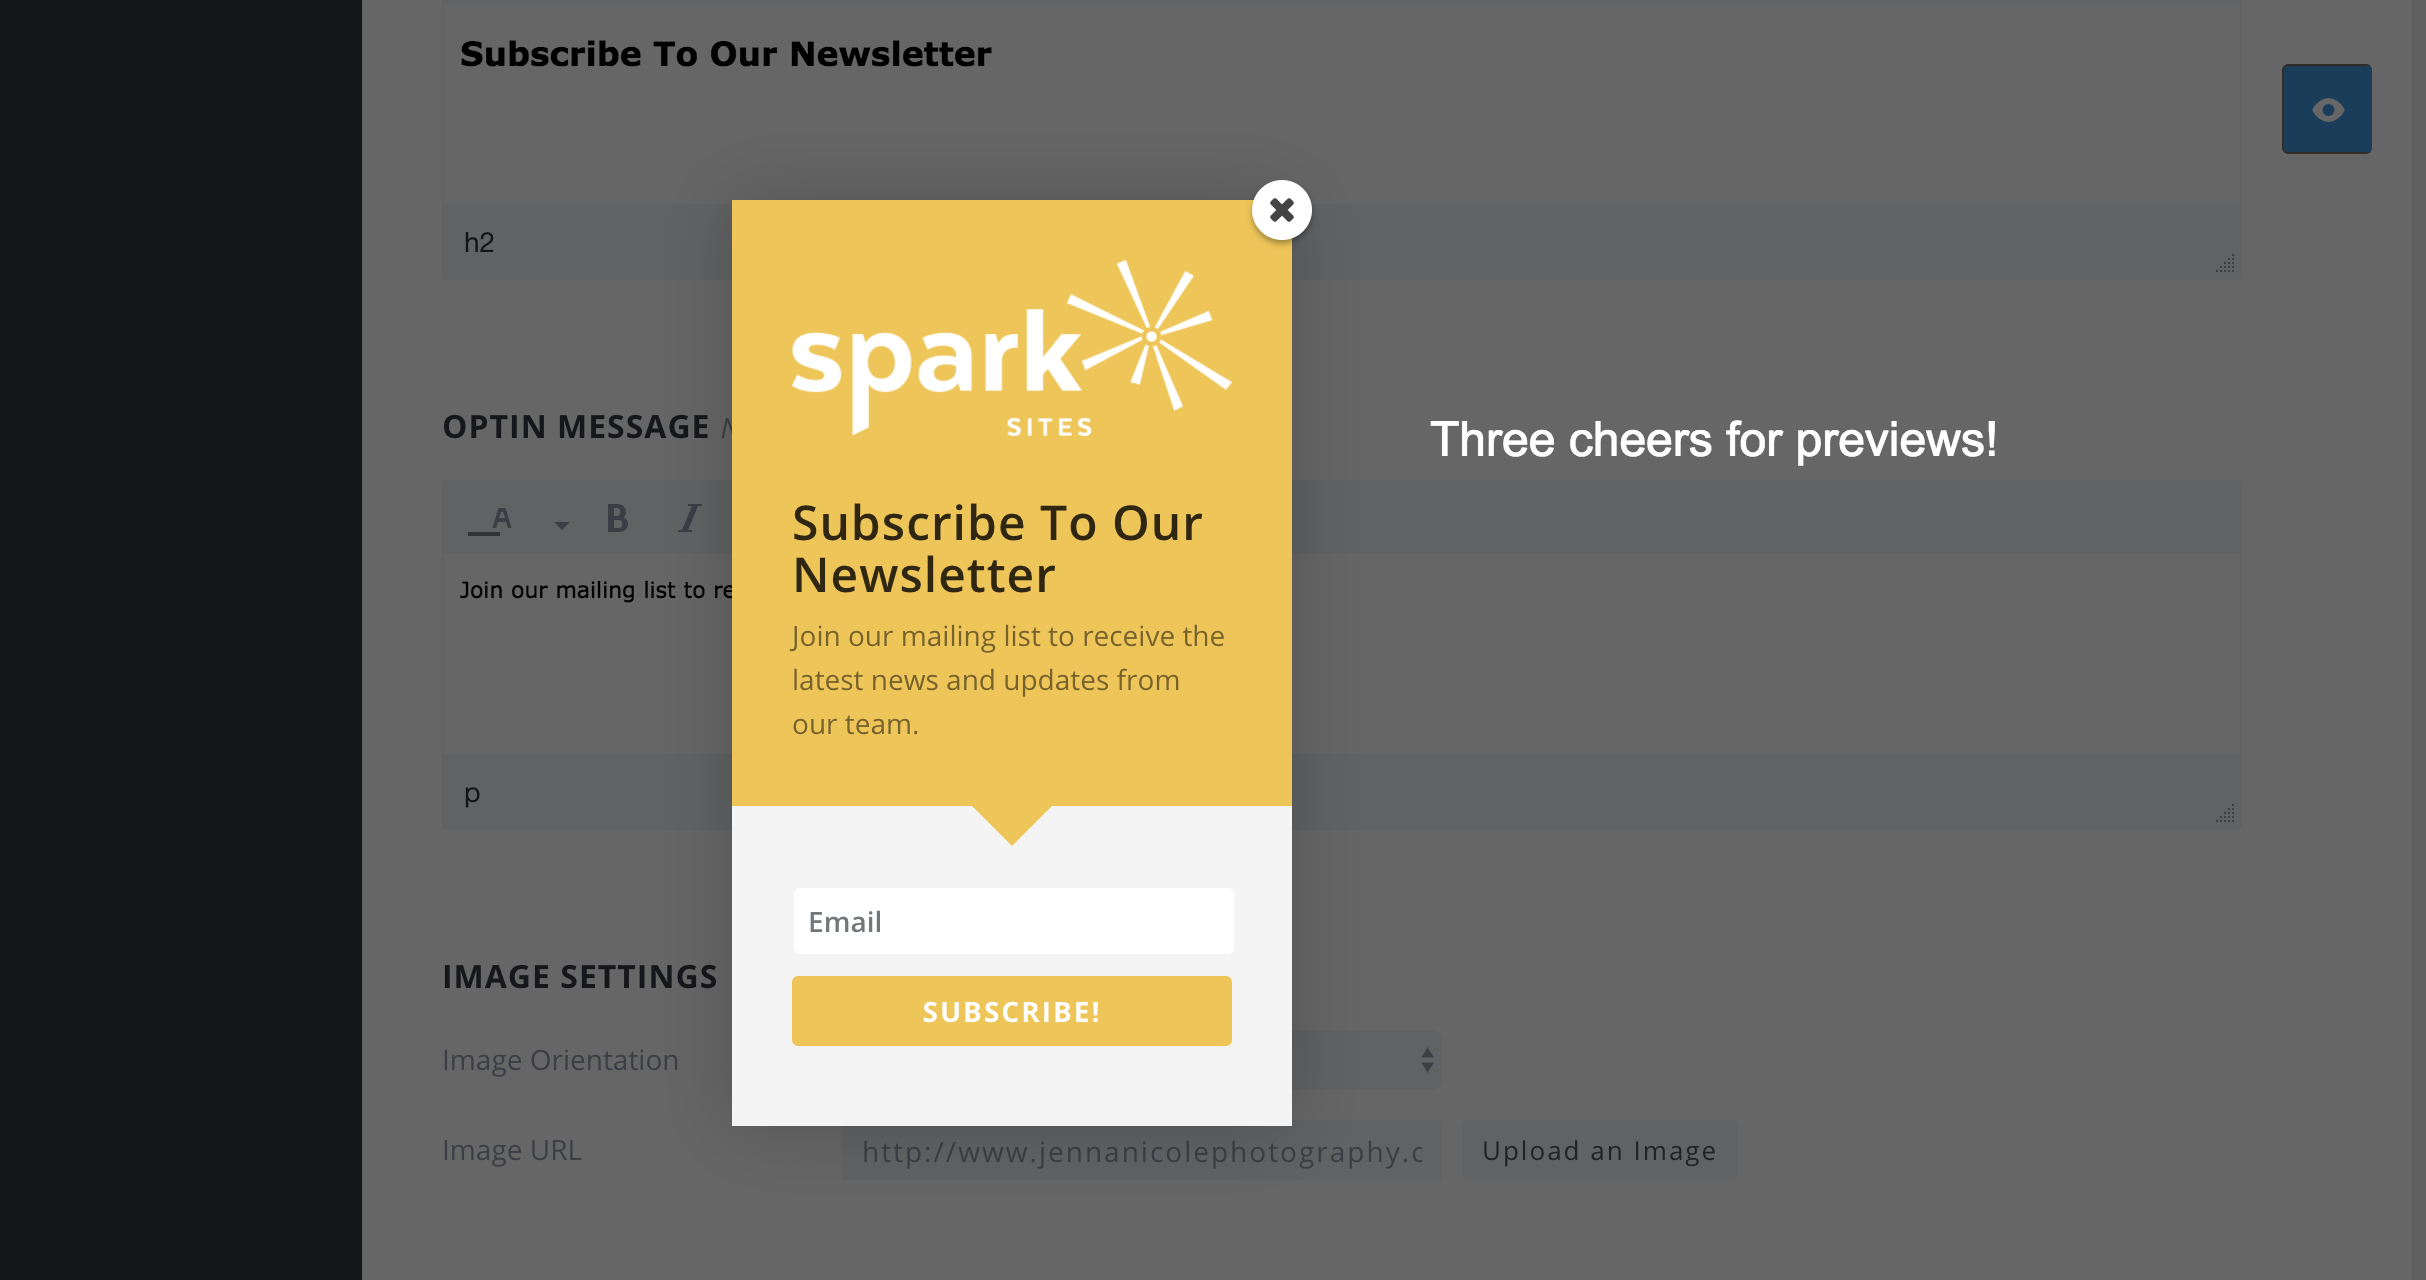
Once you’ve chosen your template and clicked “NEXT,” you will be able to customize your opt-in. You can change the text you want to appear, add your logo, change the colors and more. If you want to preview your opt-in at anytime while customizing, just click the “PREVIEW” button at the top or the eyeball button that appears when you scroll. This will show you a preview of what your opt-in looks like.
Step 4: Choose a Success Action
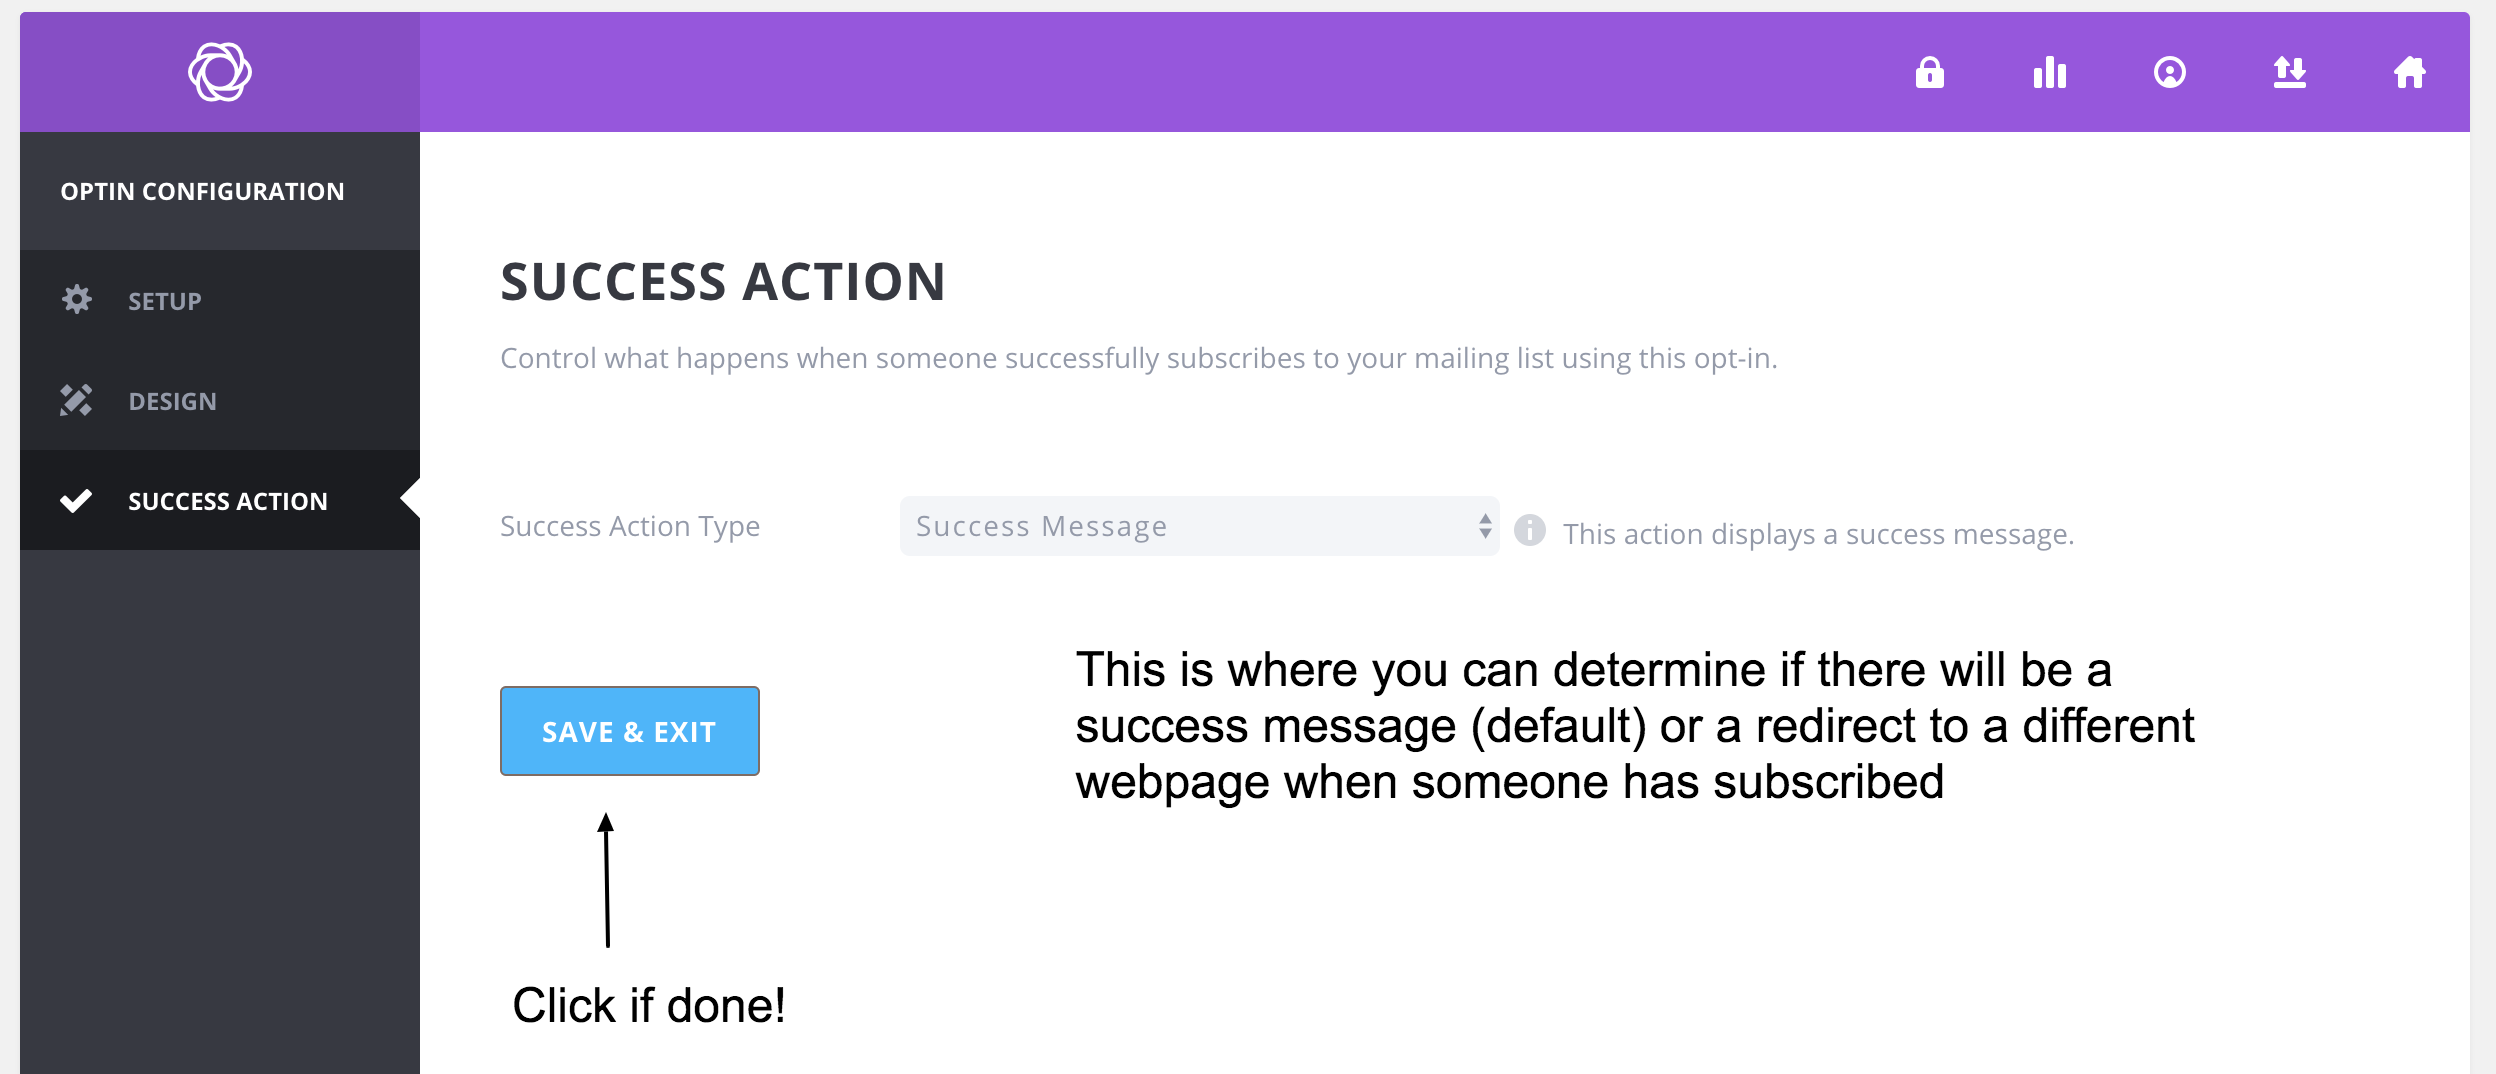
Once you’ve finished your design and clicked “NEXT” you will be asked what type of success action you want. A success message is the default action, which you will have likely entered in the text for on the design page. The redirect option allows users to be redirected to a different webpage after subscribing. If you choose this option, be sure to enter the URL of the page you want to redirect to. Once you’re all finished, click “SAVE & EXIT”
Step 5: Add Bloom Widget to Sidebar
Now that you’re finished making your opt-in, you need to actually add it to the sidebar. Go over to the lefthand menu in the dashboard and select Appearances > Widgets. Once on your widget page, you will want to drag the Bloom widget over to the sidebar area.
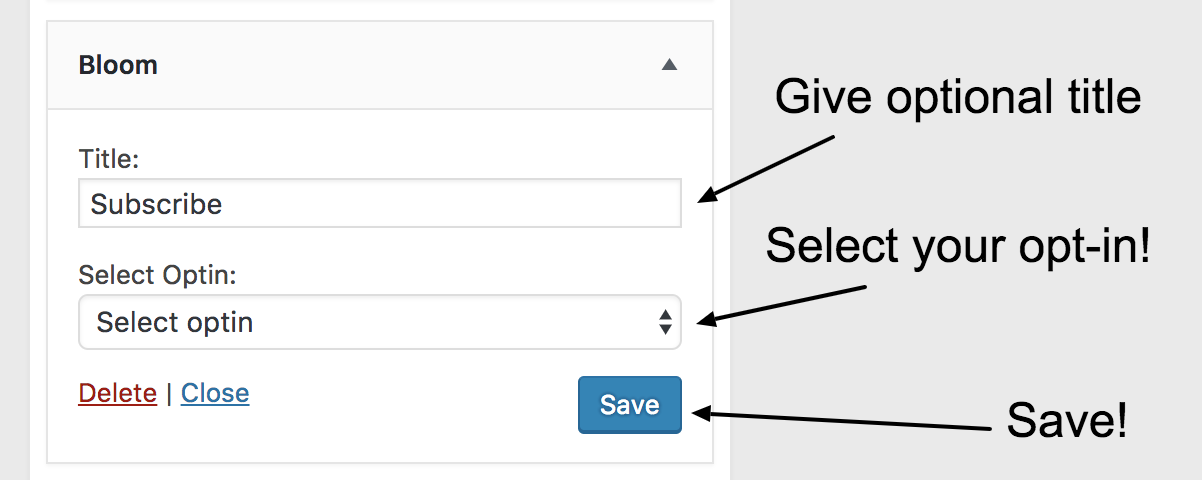
Once in the sidebar area, you can give the widget a title if you want and the select your opt-in and save! Boom! (Or should we say, BLOOM!) Now you have an opt-in within your sidebar on your website. Customers will now have the option to easily subscribe to your emails. We suggest testing the form with your email address first, to be sure it is working correctly.
If you are still stumped on any of these steps, feel free to contact us and we’d be happy to help navigate you through adding Bloom opt-ins to your website!

