Raise your hand if you love Google Calendar and your life would be a disorganized mess without it! (raising our hands as we type!) What if we told you there was a way to add your Google Calendar to your website! Why is this so great? Because if you’re a business that holds a lot of events you want your clients and customers to know when those events are. Adding a calendar to your website is a clean, simple and user friendly way to let the people know what’s happening! In this tutorial, we will walk you through the steps of adding Google Calendar to your site.
Step One: Download the Simple Calendar Plugin
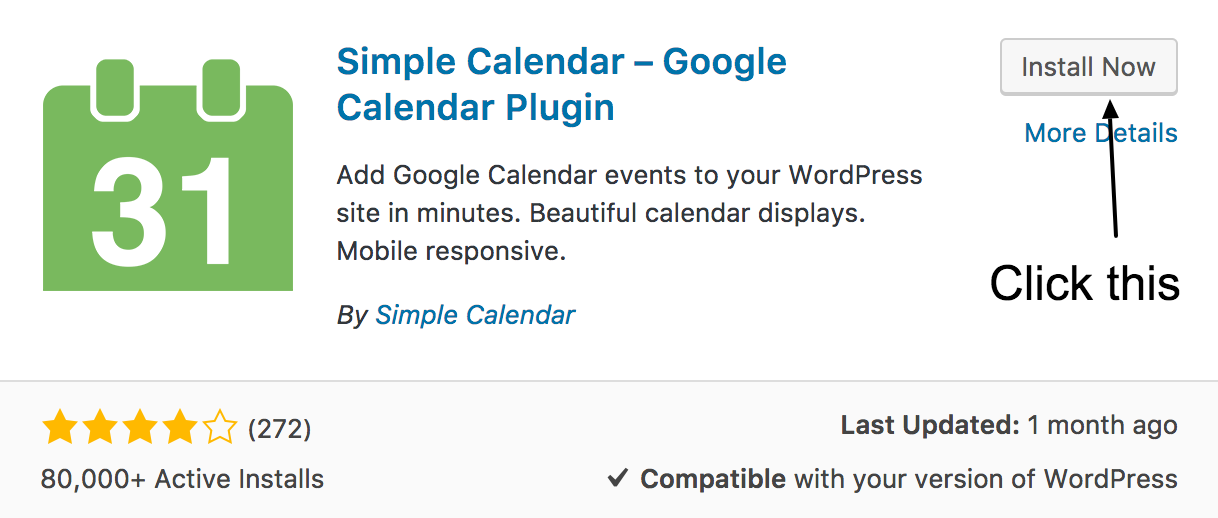
In your sidebar menu in your Dashboard there is a menu item called “Plugins.” Hover your cursor over Plugins and select “Add New.” You will then search for Simple Calendar and download and activate your plugin.
Step Two: Create a New Calendar
Just like you did with the plugins, you will find a new menu item in your sidebar called “Calendars.” Hover over the menu item and select “Create New Calendar.” The next page will look a lot like a blog post page. Give your calendar a title just like you would do with a page or a post and then scroll down to the bottom. (Note: DON’T change anything in the content block, leave this just as it is or else the calendar will get messed up.)
Step Three: Set Up Your View Type & Events
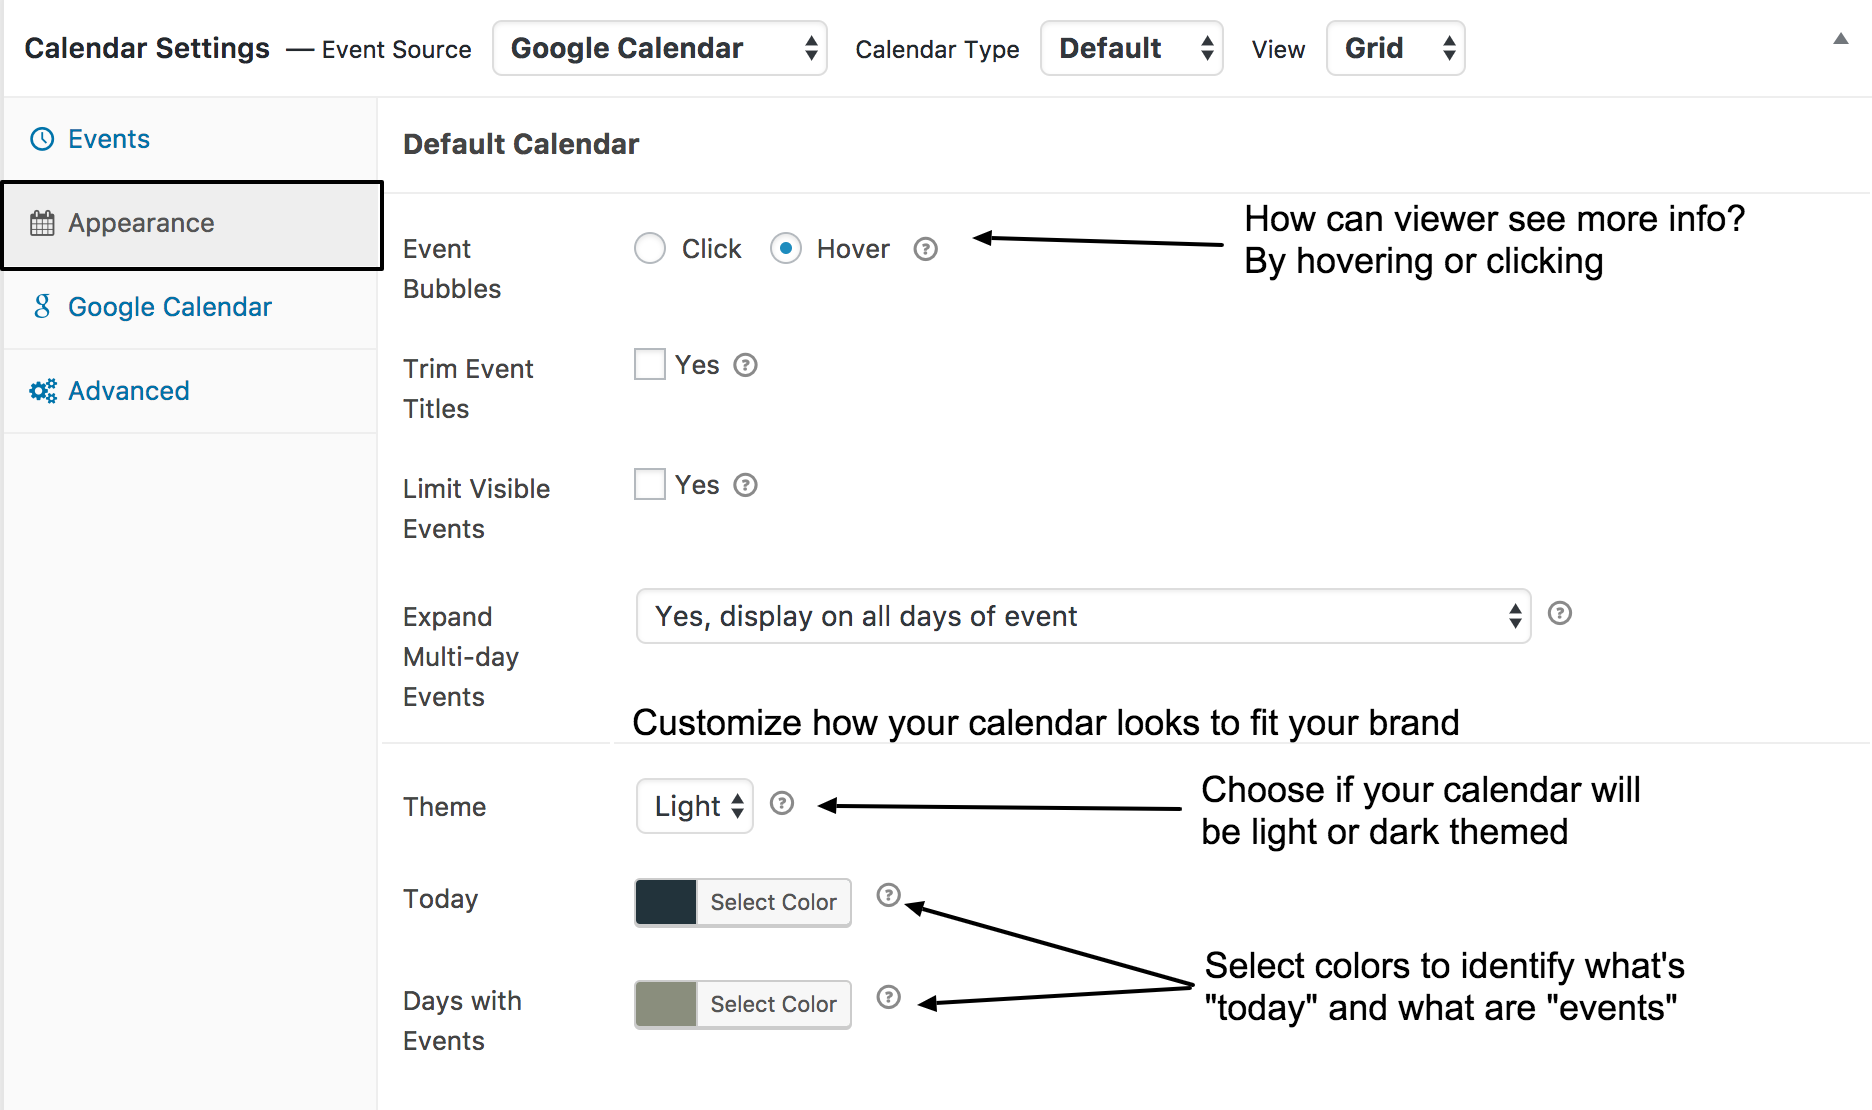
What’s so great about the Simple Calendar Plugin is it allows you to easily customize the calendar to fit the look and feel of your brand. For starters, you can either have your calendar set up in the classic grid format that looks more like an actual calendar, or in a list format. Once you have this set, you can customize your event settings that fit your events best.
Step Four: Customize the Appearance
This is the fun part! Two of the main ways you can customize your calendar is through the event bubbles and theme colors. With the event bubbles you have the option to allow users to click or hover for more information. Clicking will send them to a different page with more information while hovering will allow another bubble to pop up with the information. The colors allow you to really zero in on your business identity. You can set the overall theme to be light or dark and then enter in actual hexadecimal color codes for the whatever day “today” is and another color for days where events are happening. This will make it easier for the user to define when events are by just looking at the calendar.
Step Five: Sync Your Calendar
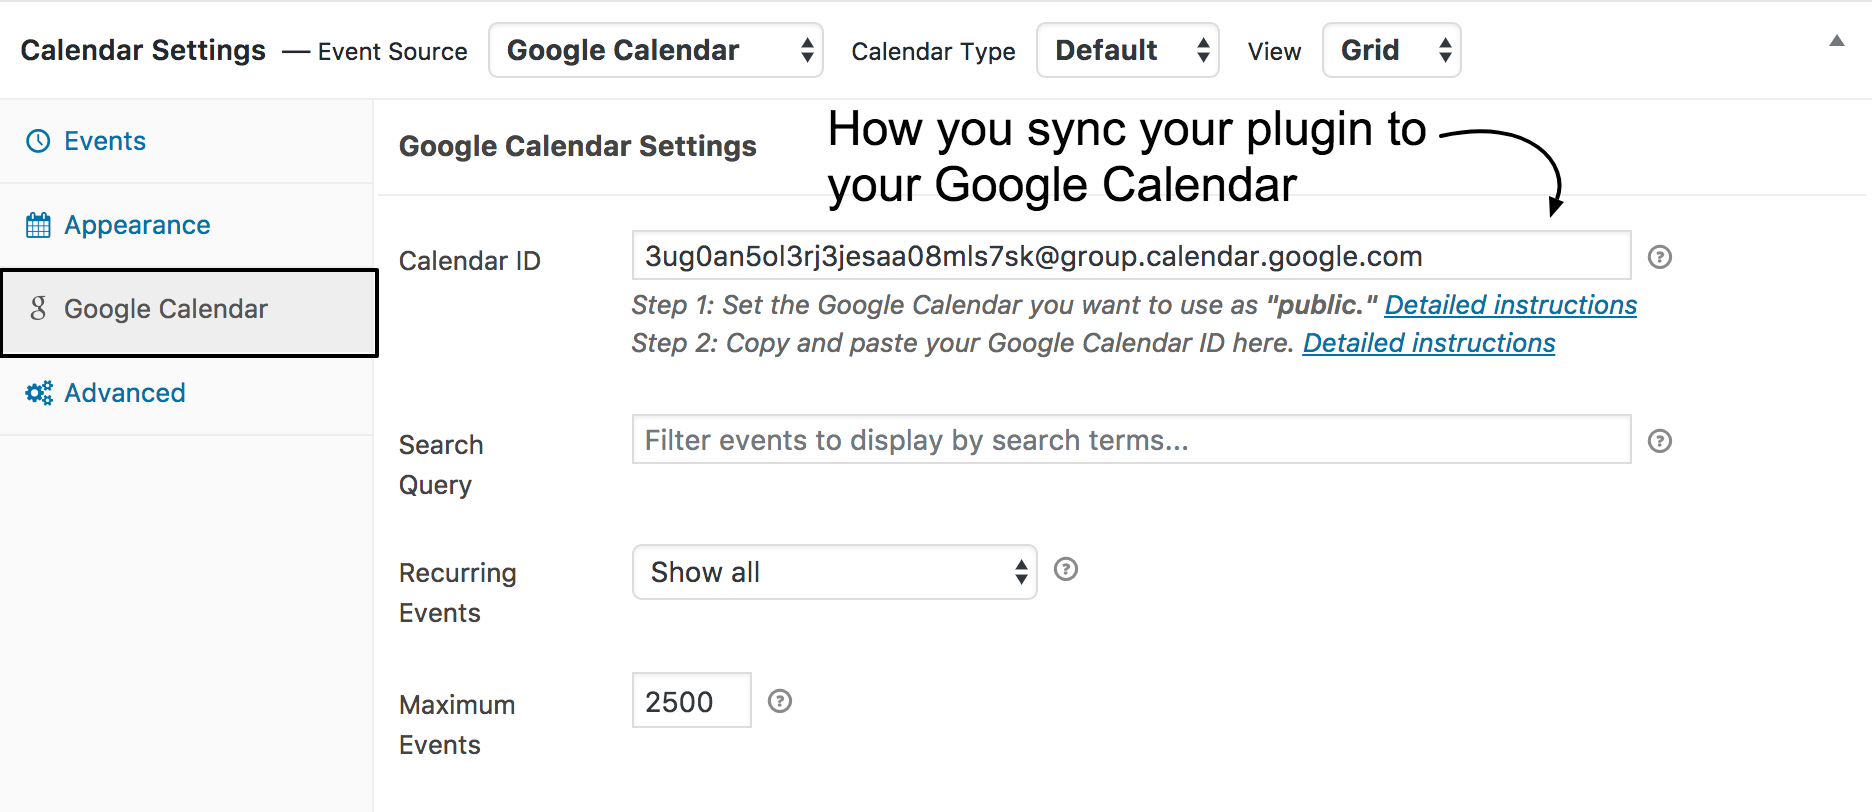
This is where the magic happens! In the Google Calendar tab you will need to enter your Calendar ID for everything to sync up and make sure your selected calendar is public and not private. For a step-by-step guide on how to get your Calendar ID follow this easy tutorial. And to make sure you calendar is public you can follow this guide here. Once you have your Calendar ID, paste it in the given field.
Step Six: Get Your API Key
Once you have all your settings where you need them, publish your calendar. If you don’t already have an API Key you will see an alert at the top of the page with a link to take you to the page where you’d enter an API Key. The calendar won’t work on your website without an API Key from Google. It’s not as scary as it sounds! To find out how to get an API Key you can follow this excellent step-by-step tutorial. Once you’ve followed the steps, copy and paste your API Key into the given field and wa-la, your calendar should be ready to rock n’ roll!
Step Seven: Copy and Paste the Shortcode
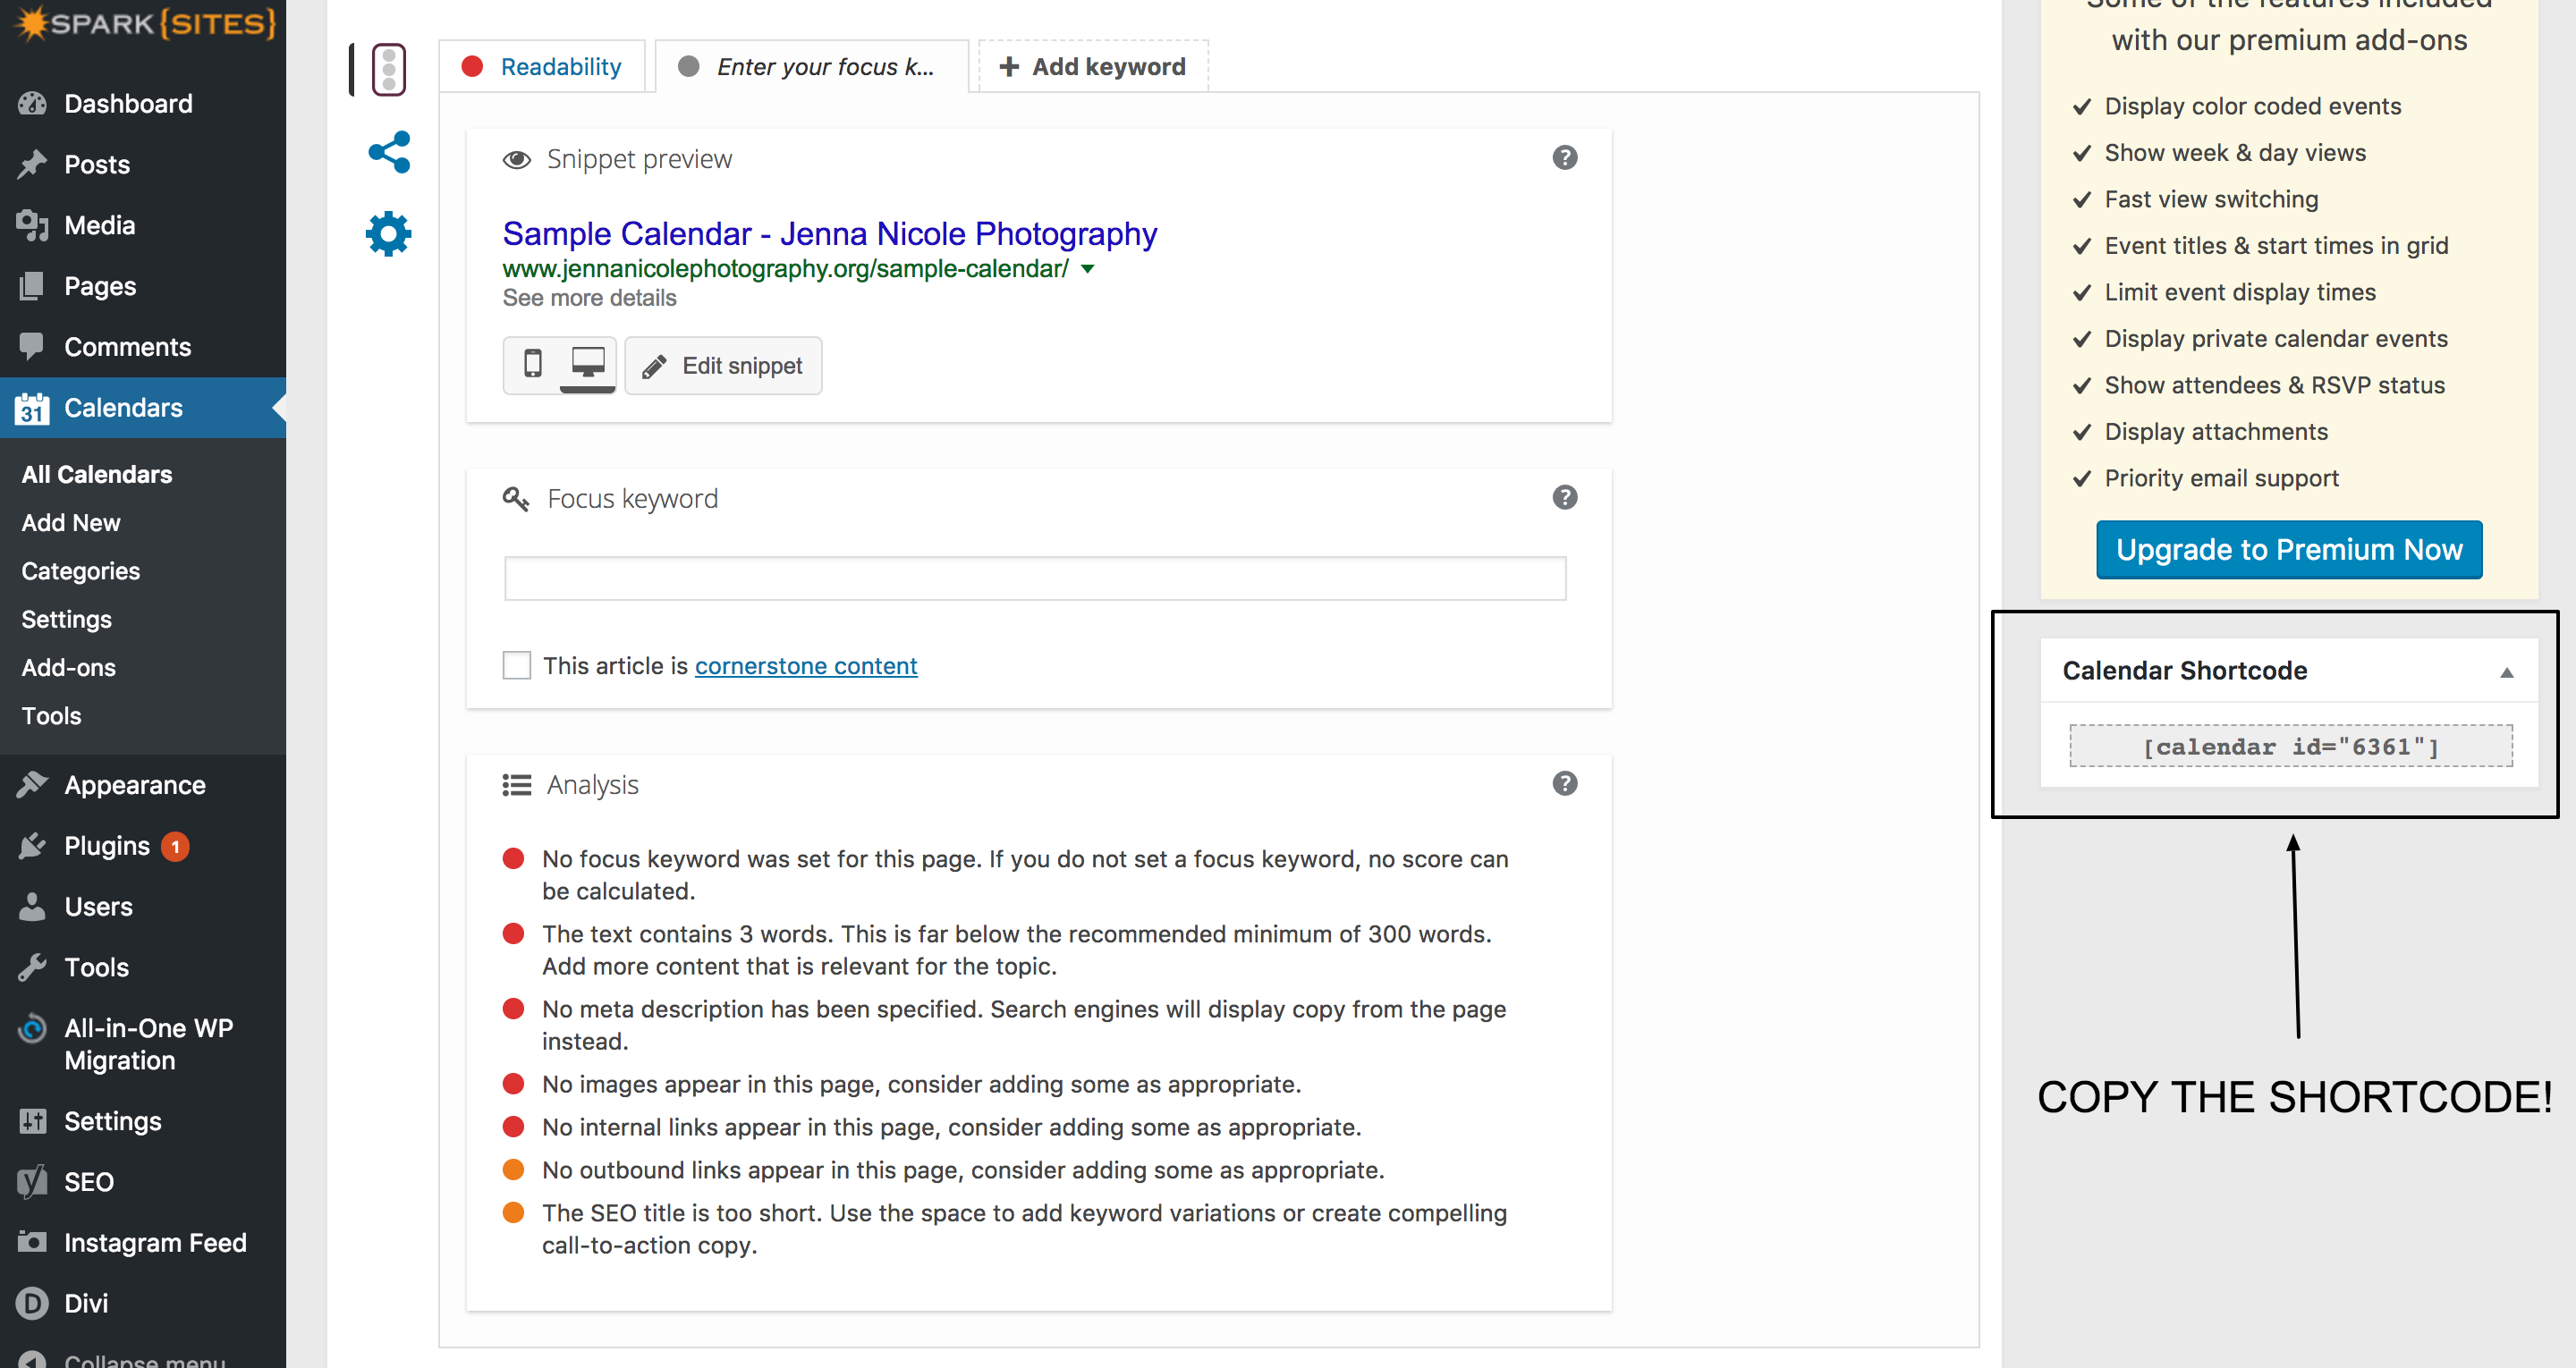
Once you have your API set up, go back to the back-end of your calendar. Scroll down to where the calendar settings are and copy the shortcode given in the righthand sidebar. Once you have the shortcode copied, go the page where you’d like your calendar to be and copy the shortcode in the text module. Make sure you update your page!
Step Eight: Check Out Your Google Calendar on Your Live Site and Pat Yourself on the Back Because You’re AWESOME!
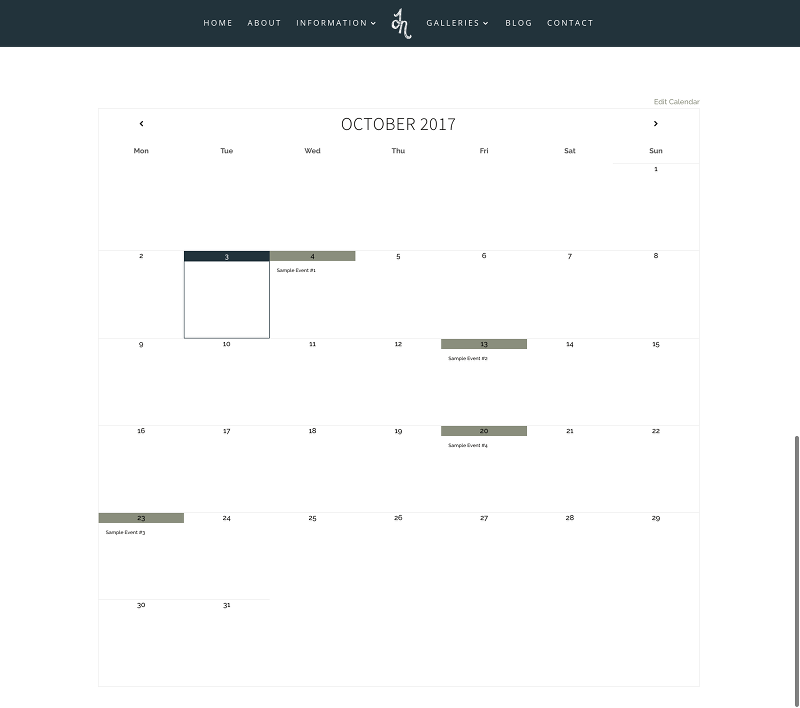
This is an idea of what your calendar should look like on your live site. Once you’ve mastered all these steps, users will be able to interact with your sweet calendar, that goes with your theme on your website! If you have any questions about any of these steps, feel free to reach out! We’d be happy to help you get your Google Calendar on your website!
