Lets be real: Facebook is literally everywhere. Any website you visit typically tells you to “like them on Facebook,” and just about anyone you come in contact with uses Facebook or at least has an account. We know that Facebook is incredibly helpful with marketing, but did you know it can be helpful with customer relations too? We’re not just talking about people liking your Facebook page, but rather communicating with your clients via Facebook! This can all be done through adding Facebook Messenger to your own website. We’re going to tell you why adding this to your website is a good idea, and how you can add it!
Why You Should Add Facebook Messenger to Your Website
If you already have a contact form on your website, why should you add Facebook Messenger? Because of the synchronicity Facebook Messages has to offer you can get to sealing the deal faster. You see when someone fills out a contact form, it usually goes to your inbox and then waits until you give your email your attention again. Once you respond, your customer will get an email back, but email is so impersonal anymore.
With Facebook Messenger you and your team get a notification when someone reaches out and you can respond much faster! Plus everyone feels more personal chatting though Facebook than they do through and email. You can make your potential customer feel more comfortable with your business by chatting with them through Facebook Messenger. Are you sold yet? If so, let us show you how to add this feature to your website!
How to Add Facebook Messenger to Your Website
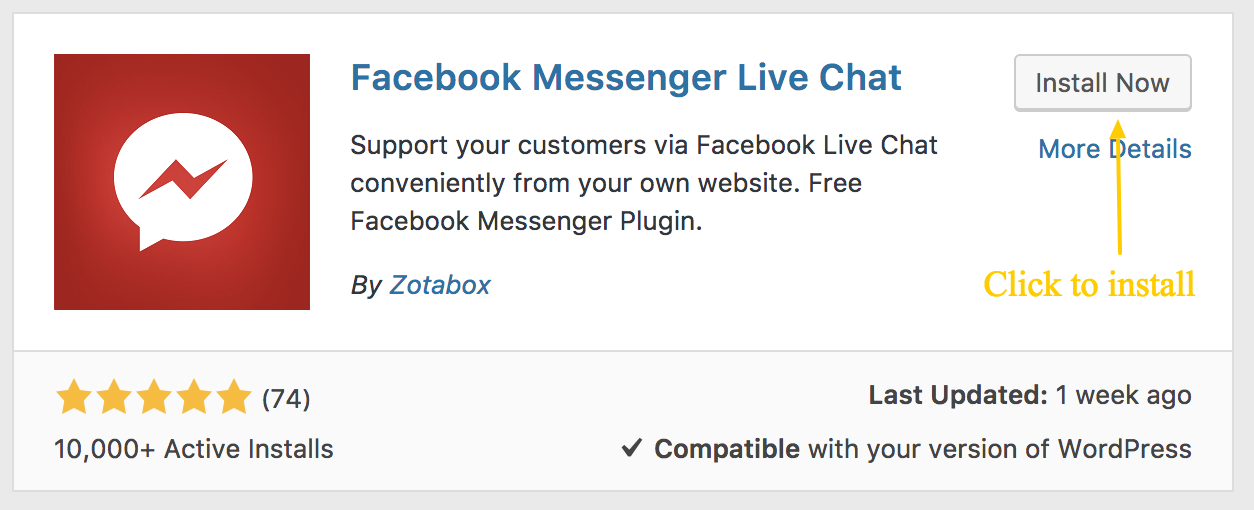
To add Facebook Messenger we suggest using the plugin Facebook Messenger Live Chat by Zotabox. This is the most user friendly way to add and customize how Messenger will appear on your website.
So on your sidebar menu in your Dashboard, go to Plugins > Add New.
Search “Facebook Messenger Live Chat.” Once you’ve found the plugin by Zotabox click “Install Now” once it’s finished installing click “Activate.”
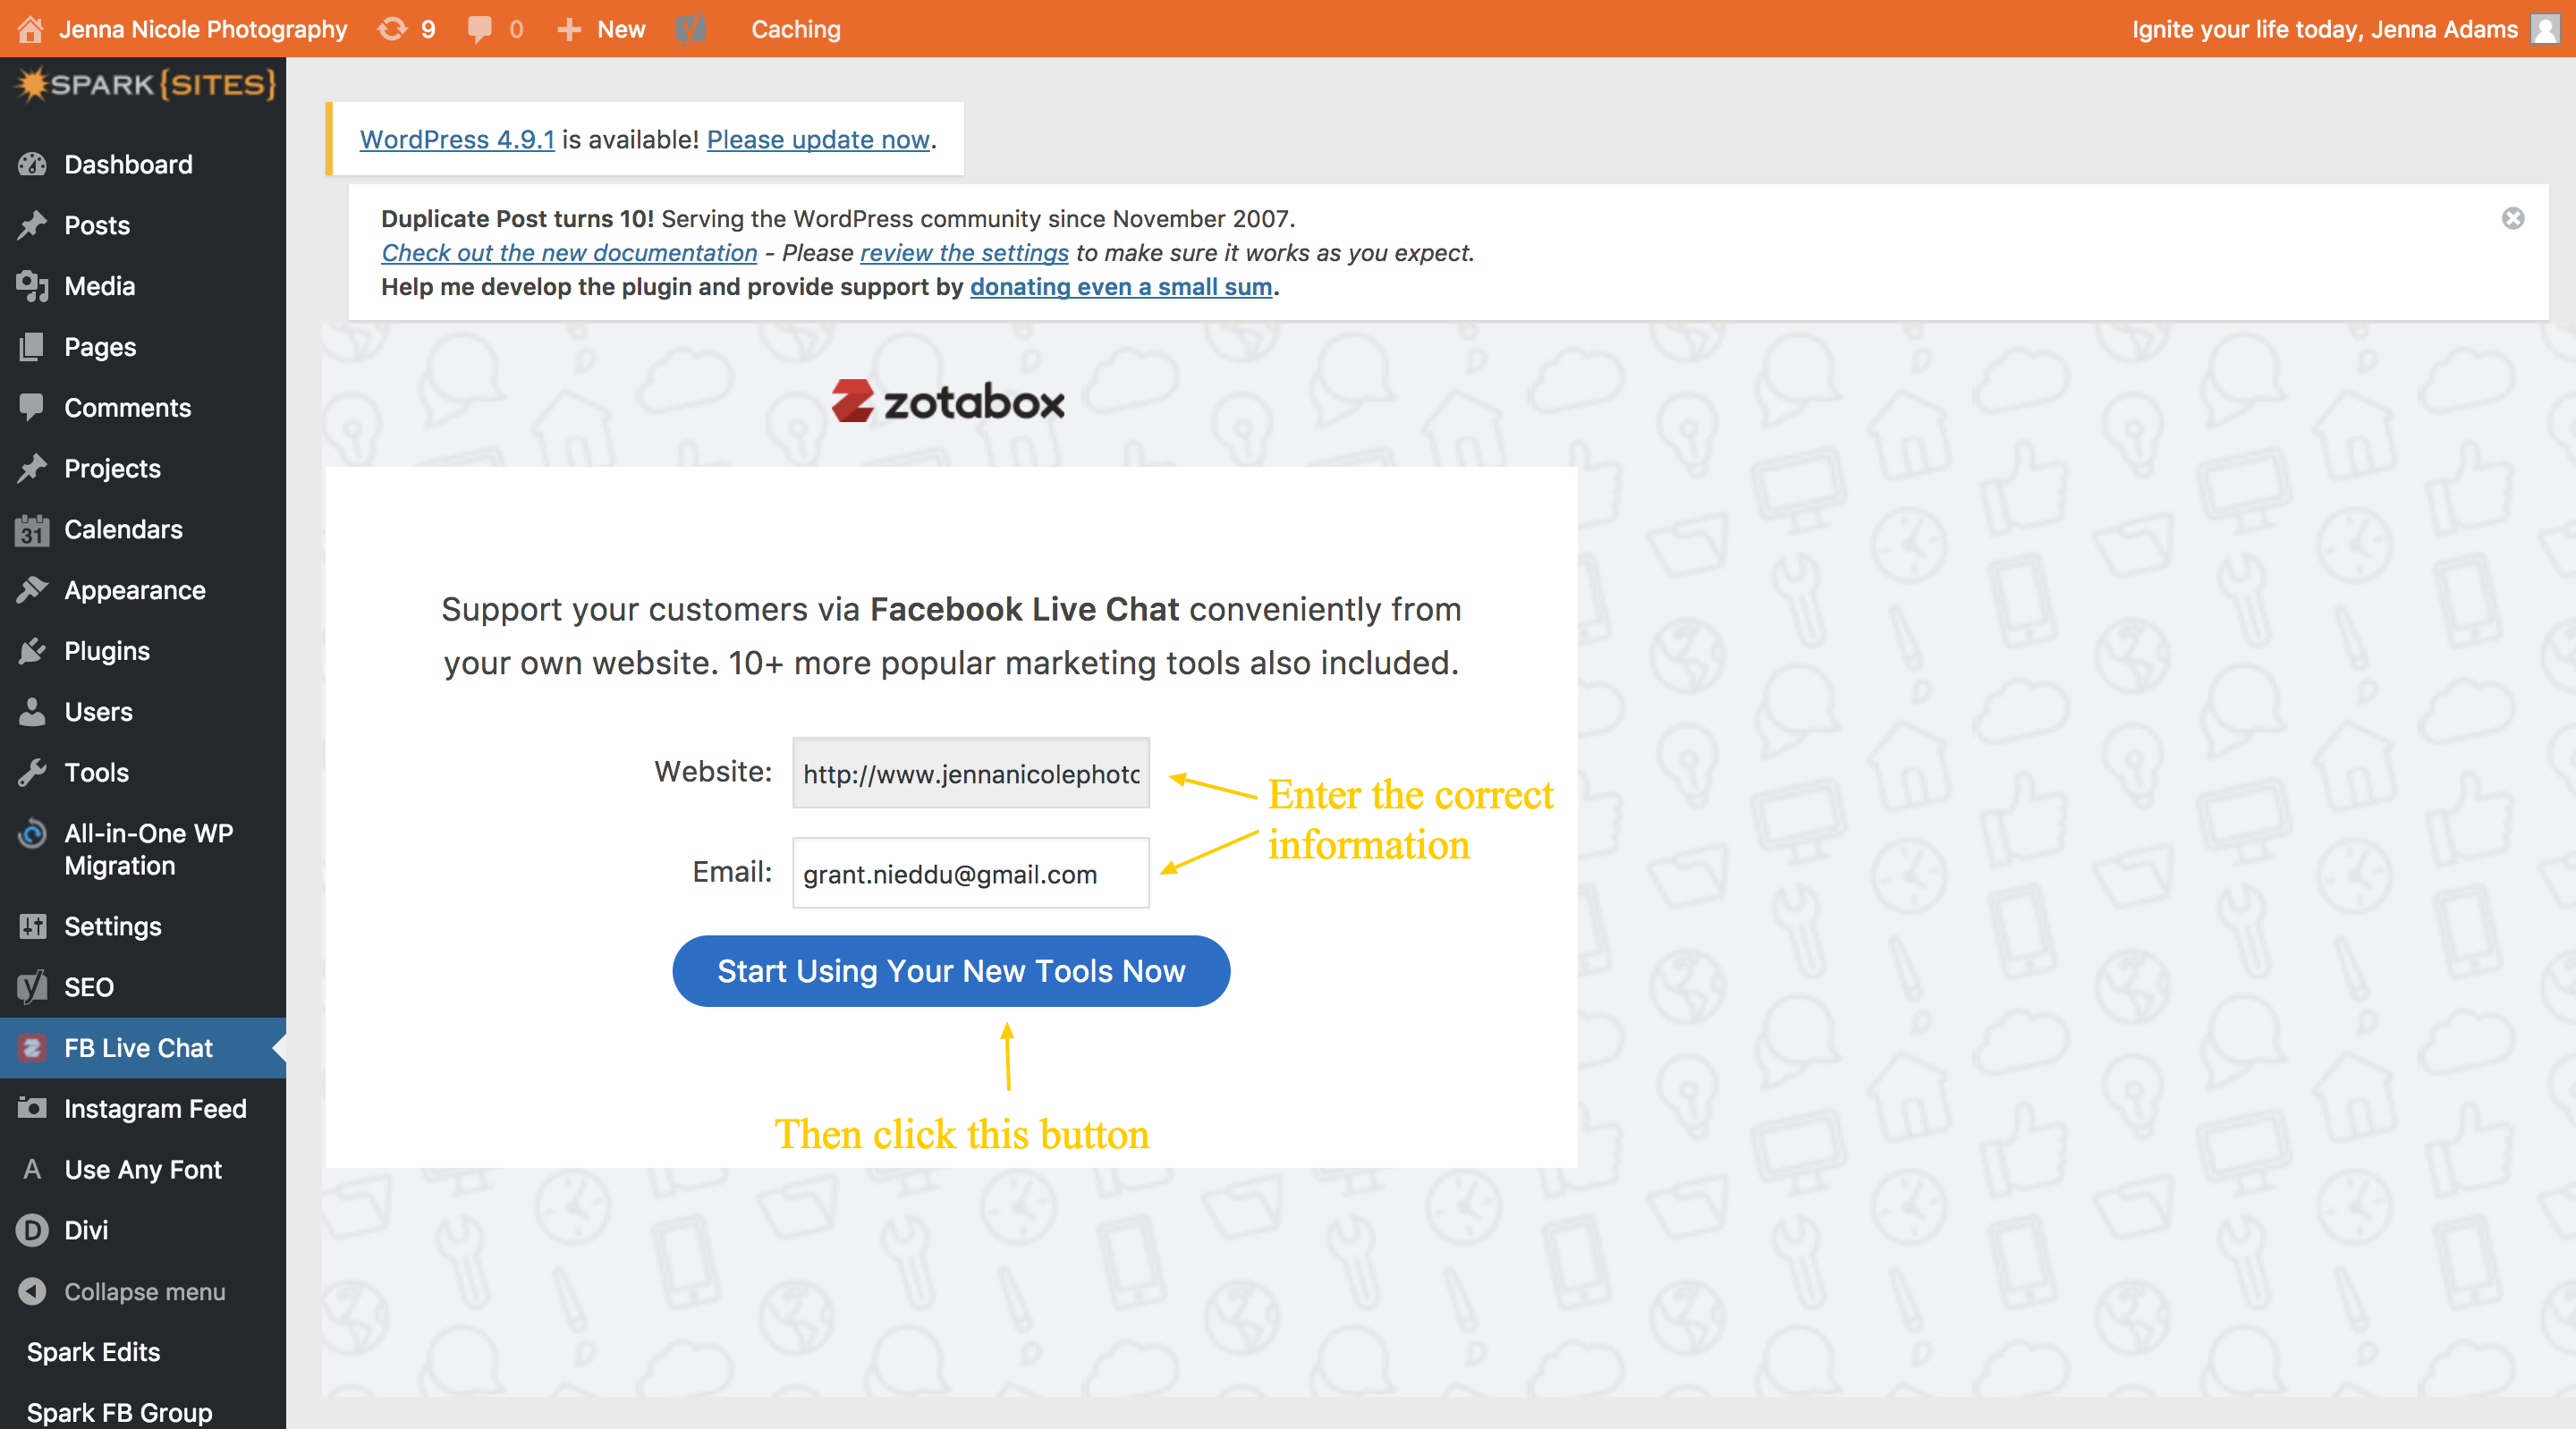
Once the plugin is installed and activated you will notice a new menu item in the dashboard menu called “FB Live Chat.” Once you click this you will find a page like this:
Your website should automatically be filled in and then make sure you enter the correct email and click “Start Using Your Tools Now.”
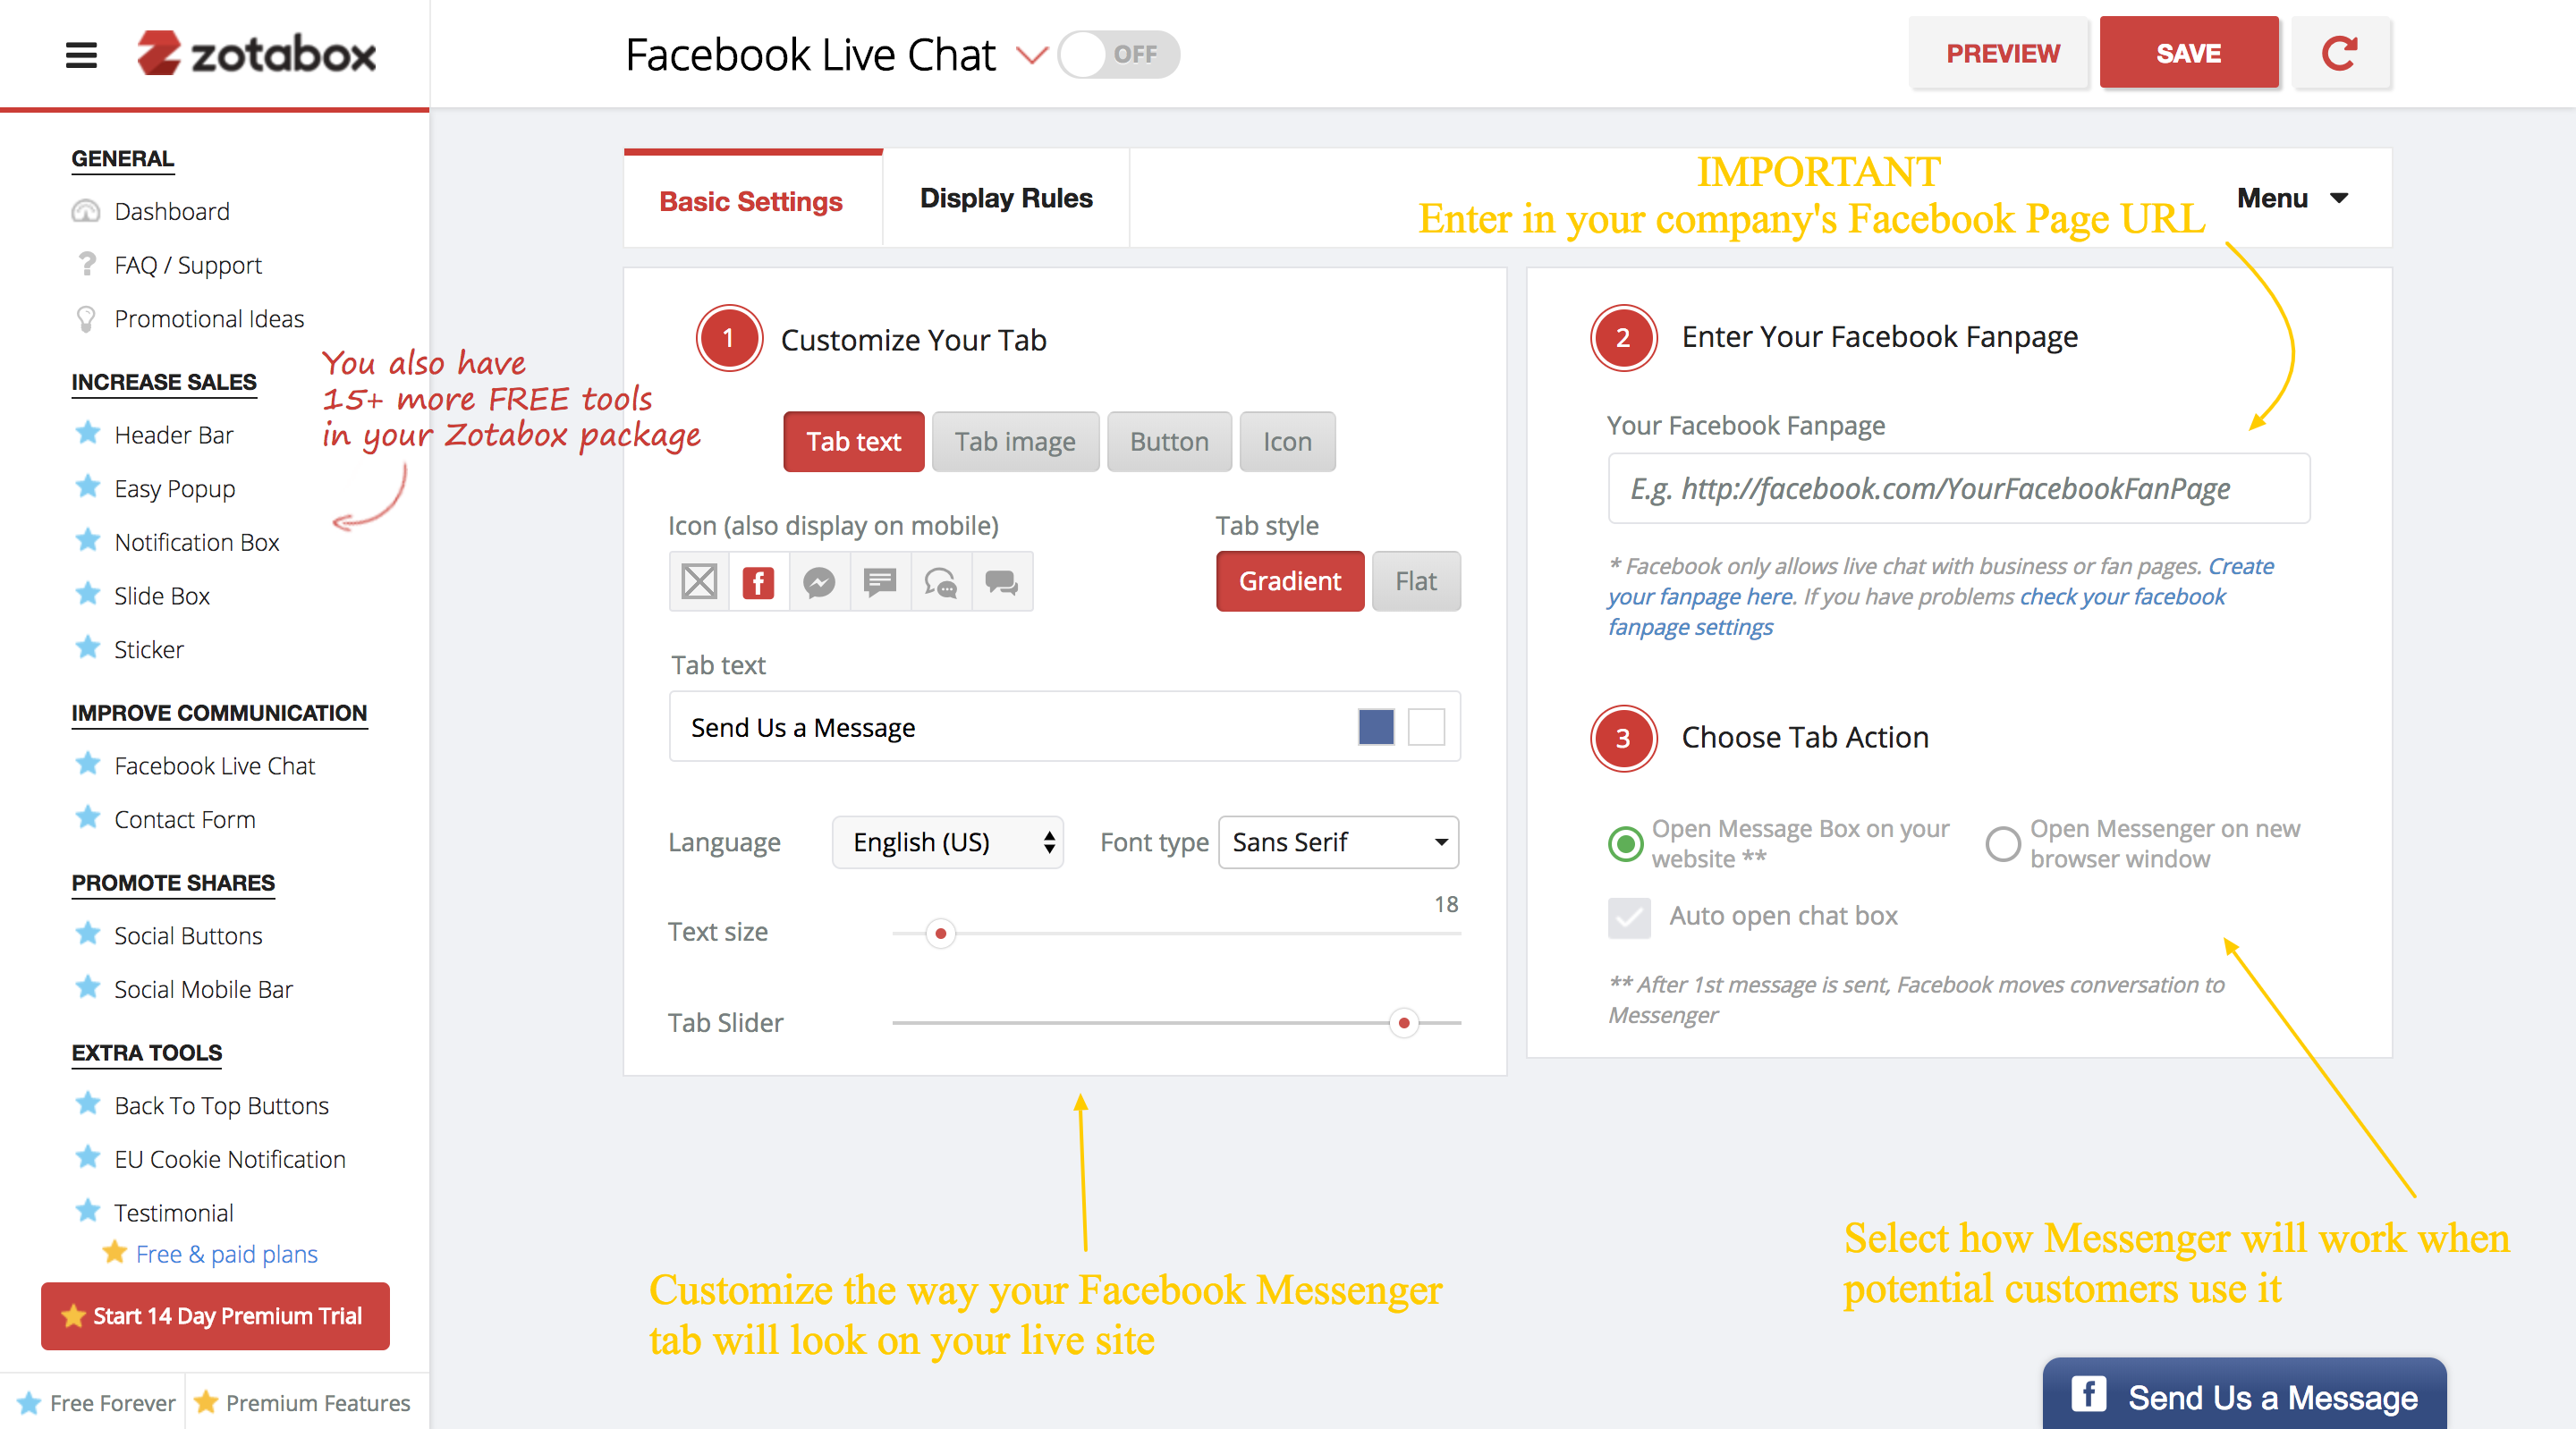
Once you click this button you will be taken to a different page. In fact every time you go into the plugin you will be brought to this page where you can customize your plugin. You will be able to edit the way the Messenger tab looks on your website and how people will interact with it. One important thing to remember is to enter in the URL of your company’s Facebook Page. If you don’t enter the URL the plugin won’t work and your clients won’t be able to reach you.
Make sure you click “Save” as the top right corner of the screen so you don’t lose your changes.
Boom! Now You Can Make New Friends (Customers)!
When people contact you through Messenger on your website, once the 1st message is sent Facebook will automatically move your conversation to messenger. You will be communicating with them through either your Pages app on mobile or through Pages on desktop. Your potential client will be using Facebook Messenger.
At the end of the day, your potential client views you as a human who can meet their need rather than a wall of text on their email. Close more sales and make new friends by adding Facebook Messenger to your website!
